My family loves bread and anytime I have a baking theme going on in my blog calendar, everyone gets very excited to try new bakes. This month, though, I am recreating many of the past bakes I have made. One such favorite is this Bialys recipe. I made 8 Bialys and proudly (or shamelessly) have to mention that we ate all 8 on the same day of baking them. We each had one as an evening snack, saying that we are tasting how the Bialy came out, and then ate the other 4 for dinner along with pasta and homemade oven-roasted tomato sauce. Having lived in New York for nearly 15 years, this Bialy recipe is close to my heart. It always feels special when we work with a recipe that is specific to the region that you live in. This was one more aspect of Bialy that made my boys even more excited.
What is a Bialy
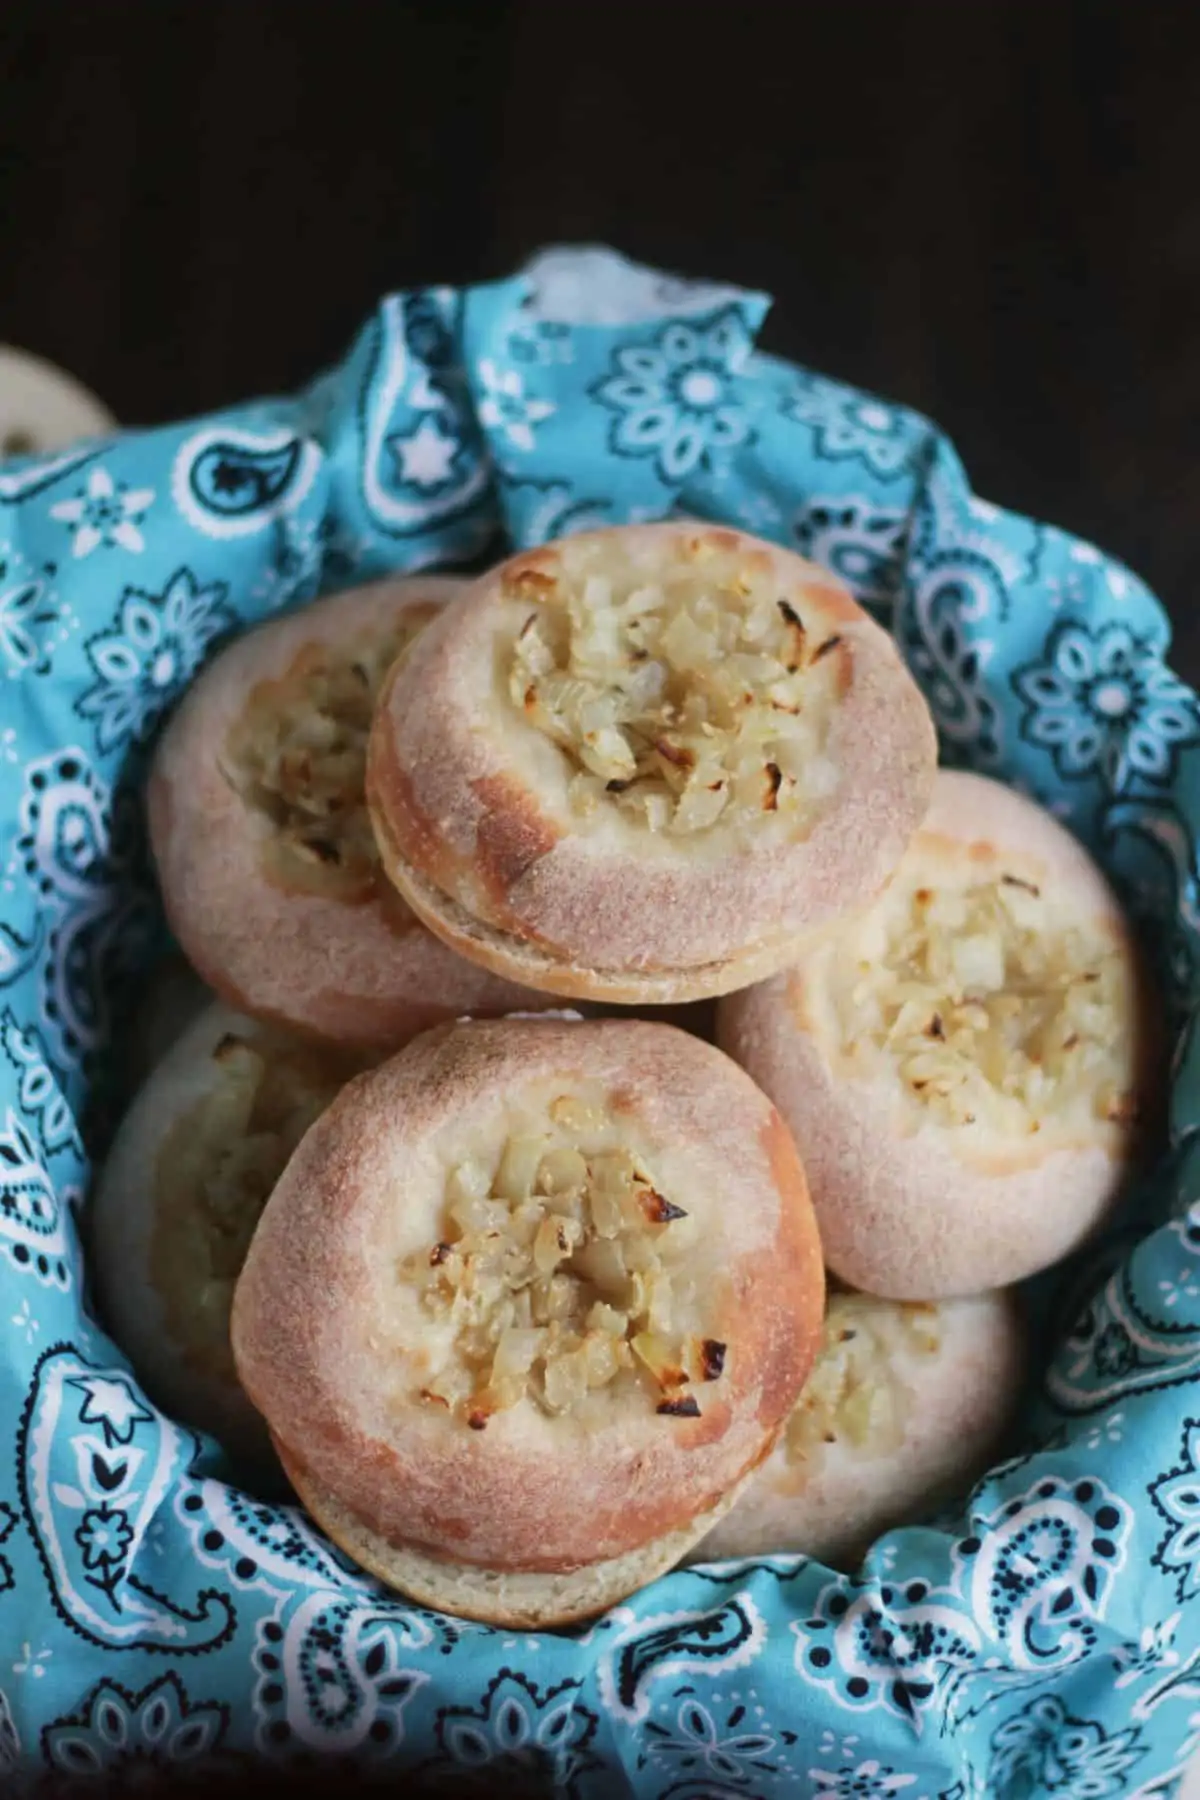
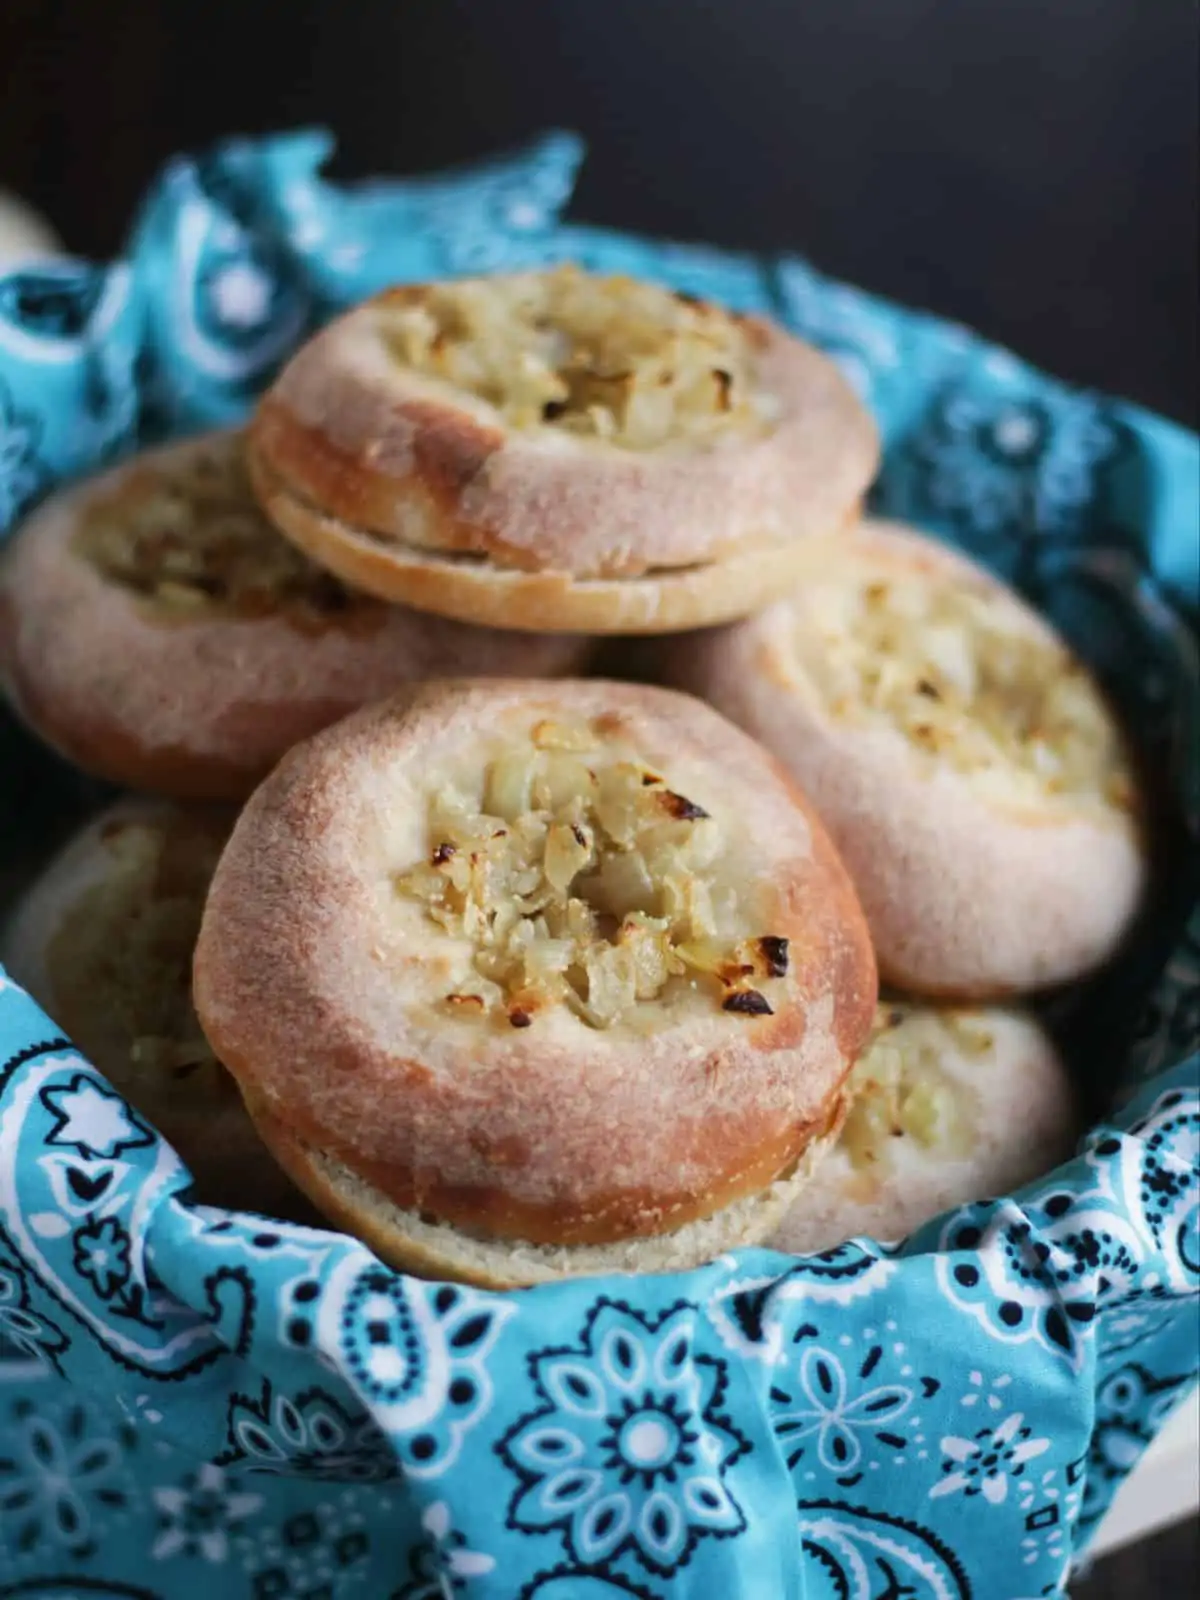
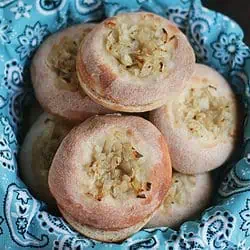
The bialy (pronounced bee-AH-lee) could be thought of as a cousin to a Bagel but is quite different from it. The name Bialy comes from Bialystocker Kuchen which translates as “bread from Bialystok” which is in Poland. In the early 1900s, many Eastern Europeans, including the Polish, immigrated to the US and settled down in New York. Naturally, they also brought their Bialy-making skills with them and that is how the New York Bialy became famous. A good Bialy has a springy soft crumb and a chewy and floury crust. Bialys are best when eaten within 5 to 6 hours of making them, but they could be stored for a day or two when wrapped tightly in an airtight paper bag or a container (if they last that long).
What’s the difference between a Bialy and a bagel?
Even though at a quick look, the Bialys look very similar to a bagel, they are quite different from each other. Firstly, a Bialy is baked whereas a Bagel is boiled and then baked. A Bialy is a round roll with a depressed center, not a hole. But a bagel has a pronounced hole in the center. Bialys are typically filled with cooked onions and poppy seeds. They also can have other ingredients added to the filling like bread crumbs or garlic. Finally have to mention that Bialys is very popular in the New York region and not much elsewhere. Whereas bagels can be found all over the country.
What makes Bialys different?
What lends Bialys its signature chewiness is the use of flour that is high in gluten. So to make Bialys, use bread flour if you can find it. Otherwise use all-purpose flour and add 1 tablespoon vital wheat gluten (for the 3 cups). There is no harm done if baked with all-purpose flour. The Bialys would be slightly softer than what needs to be. In that case, to make it slightly chewier, you could refrigerate the dough overnight after the first rise. This slow rise makes the Bialy even more flavorful and also gives it a texture.
Ingredients and substitutes
For the Bialy dough Check the recipe card at the bottom of the page for exact measurements and printable detailed recipes.
Bread flour - I would highly recommend using bread flour for the Bialy recipe so as to get that chewy texture of the rolls. If not using bread flour, use 1 Tablespoon of Vital wheat gluten along with 3 cups of all-purpose flour.
Instant yeast - we use instant yeast and not active dry yeast.
Salt
Sugar
Warm water
To make the filling
Onion - I used sweet onions but you can use any kind of onion.
Olive oil - to saute the onions
Poppy seed - I used white poppy seed but can use black as well.
Salt
Step-by-step process
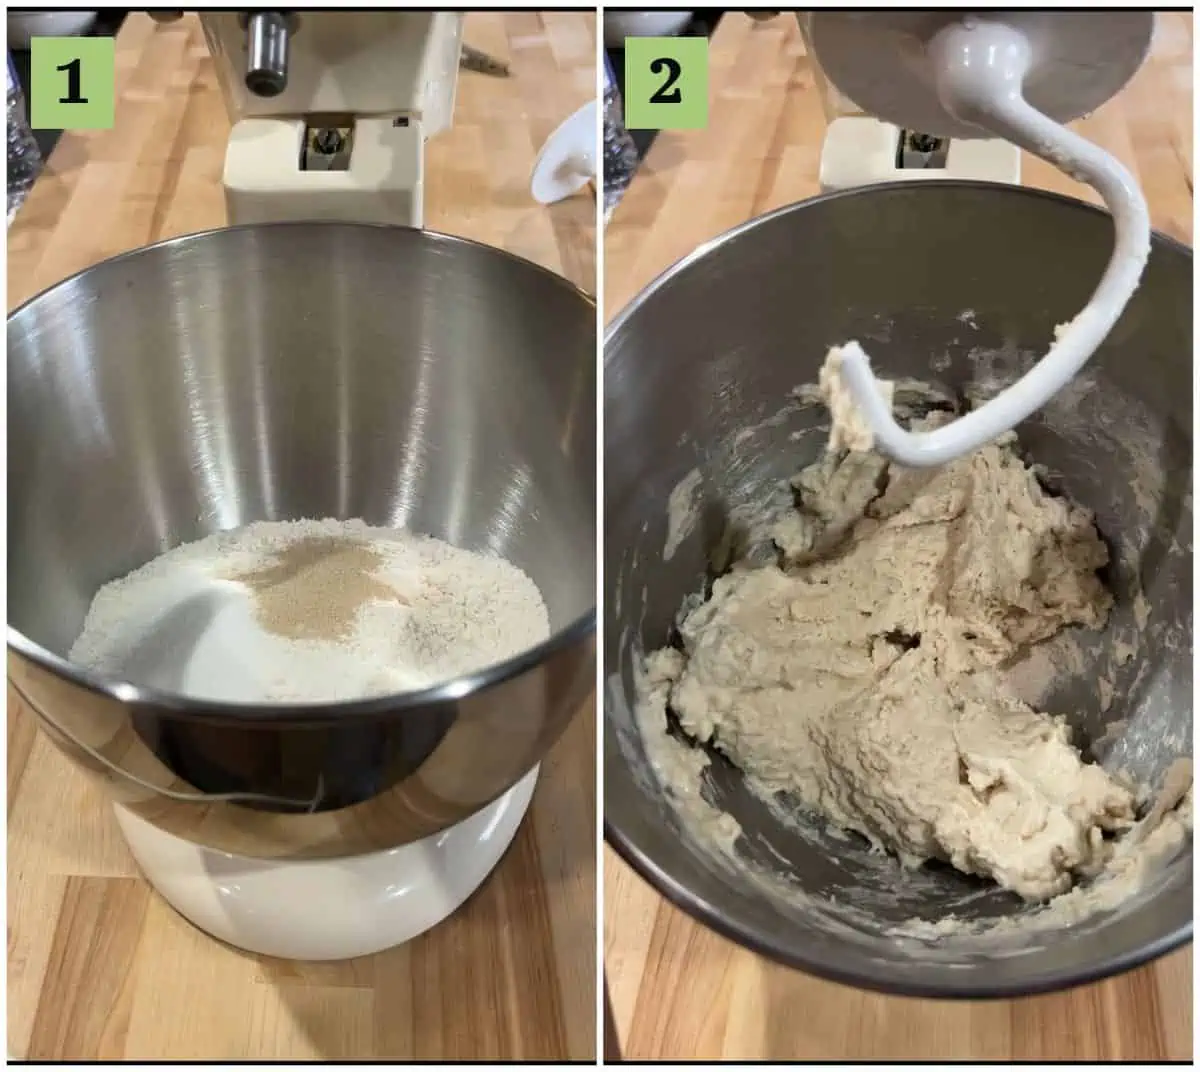
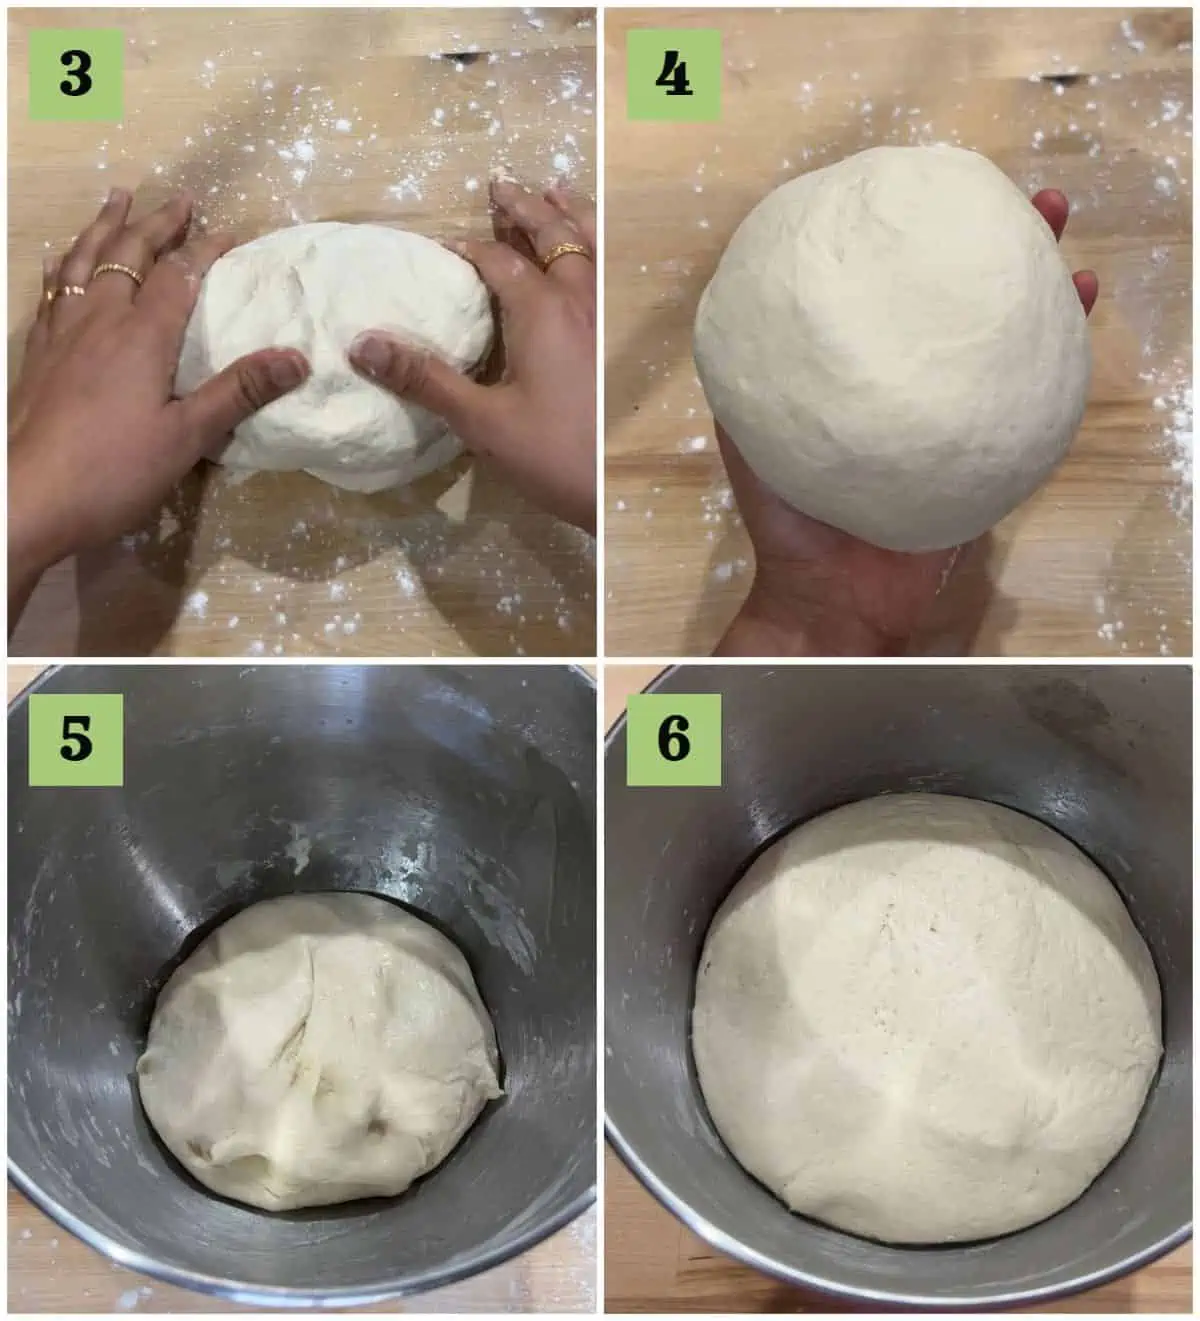
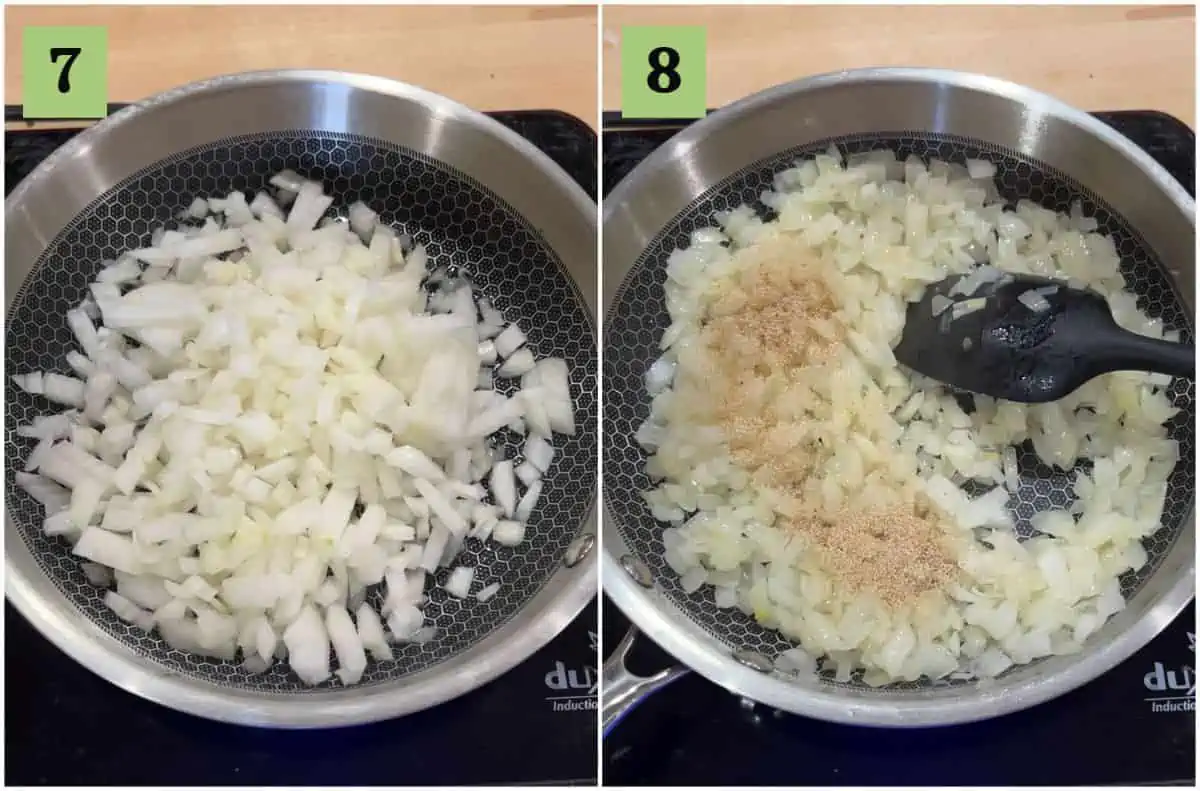
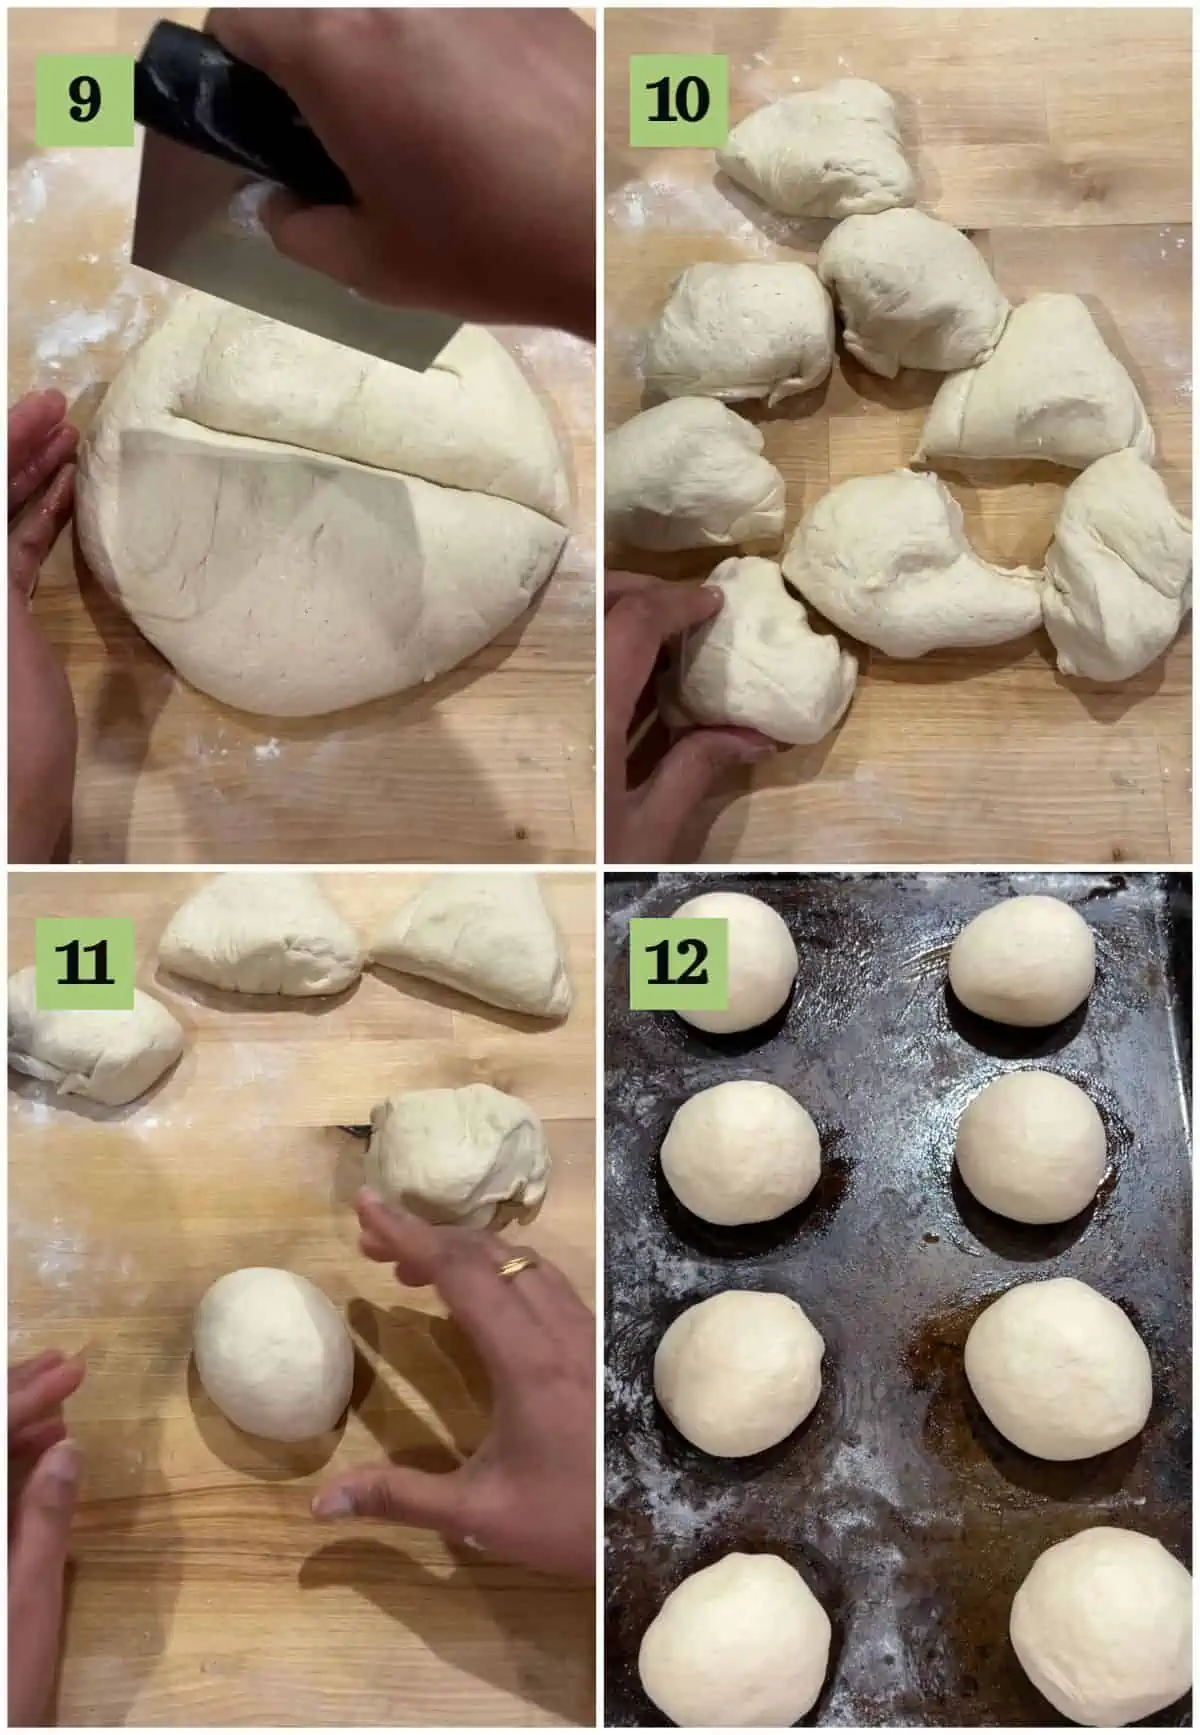
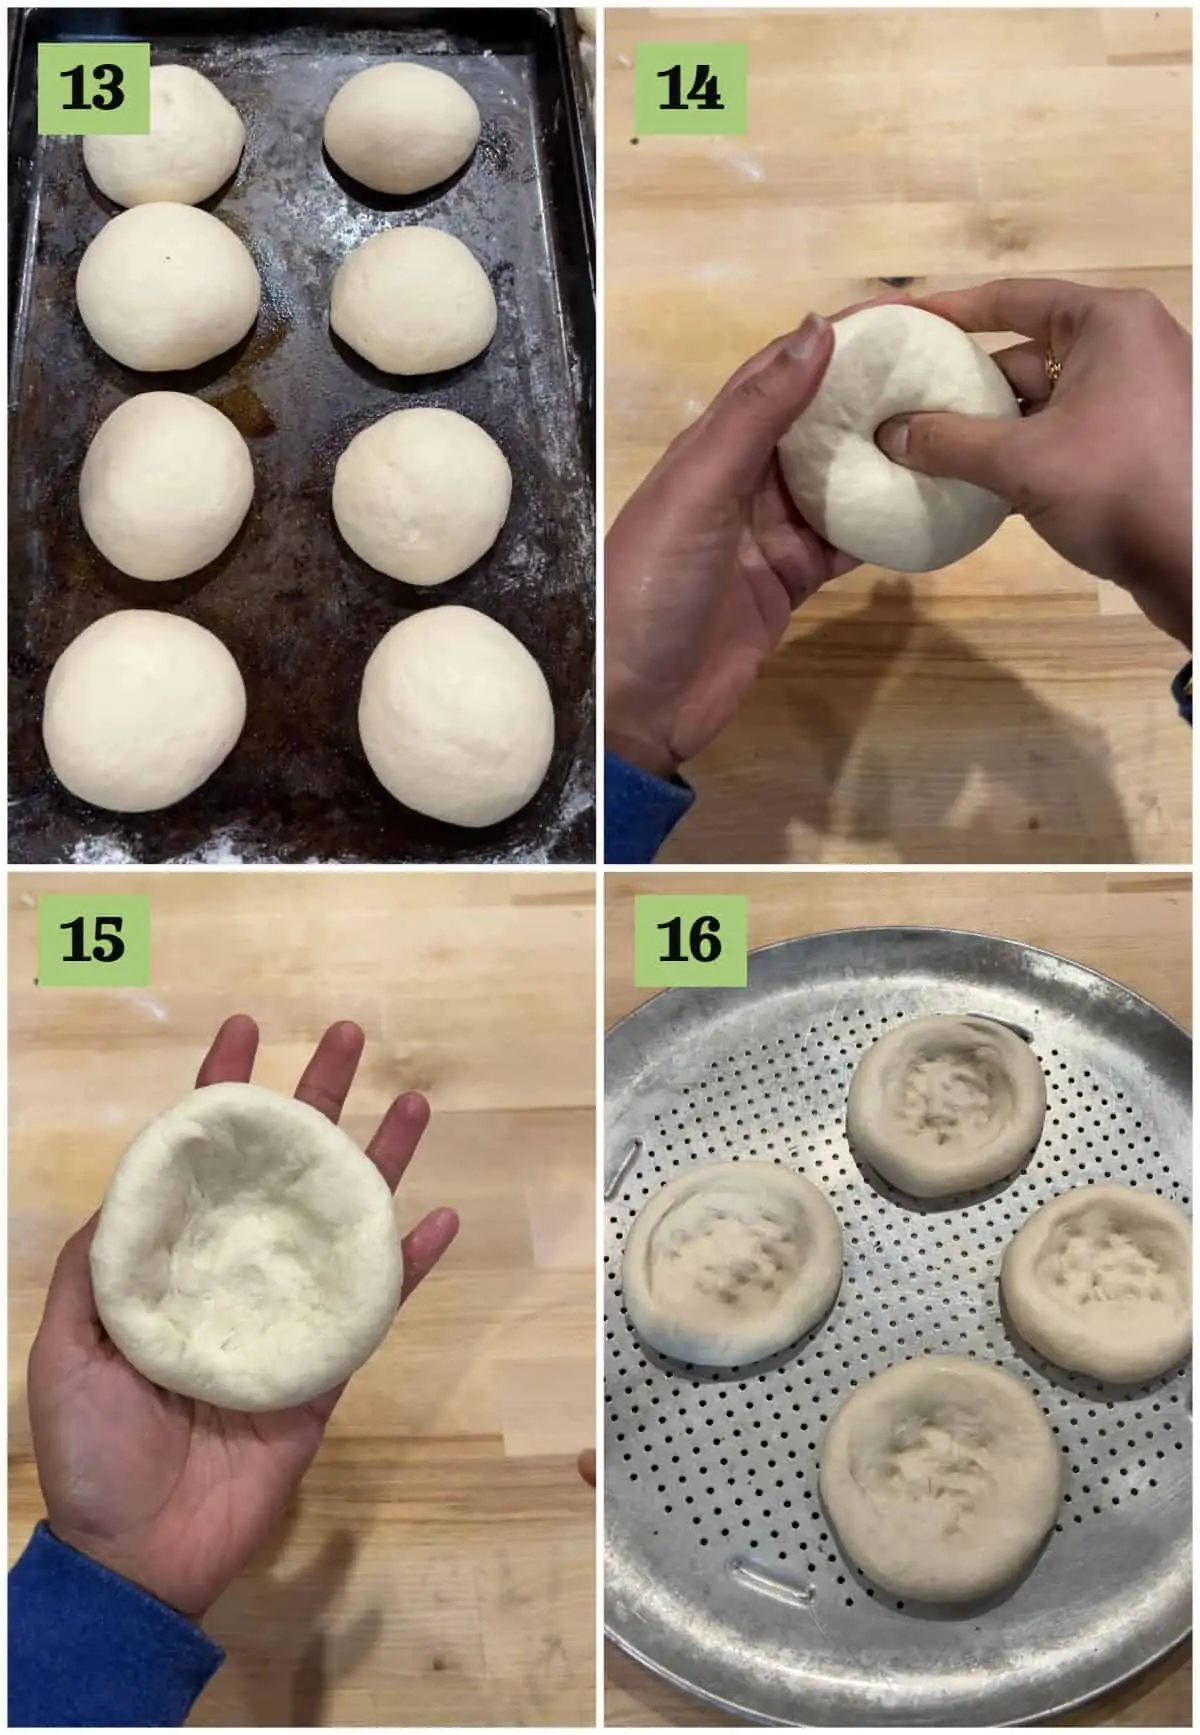
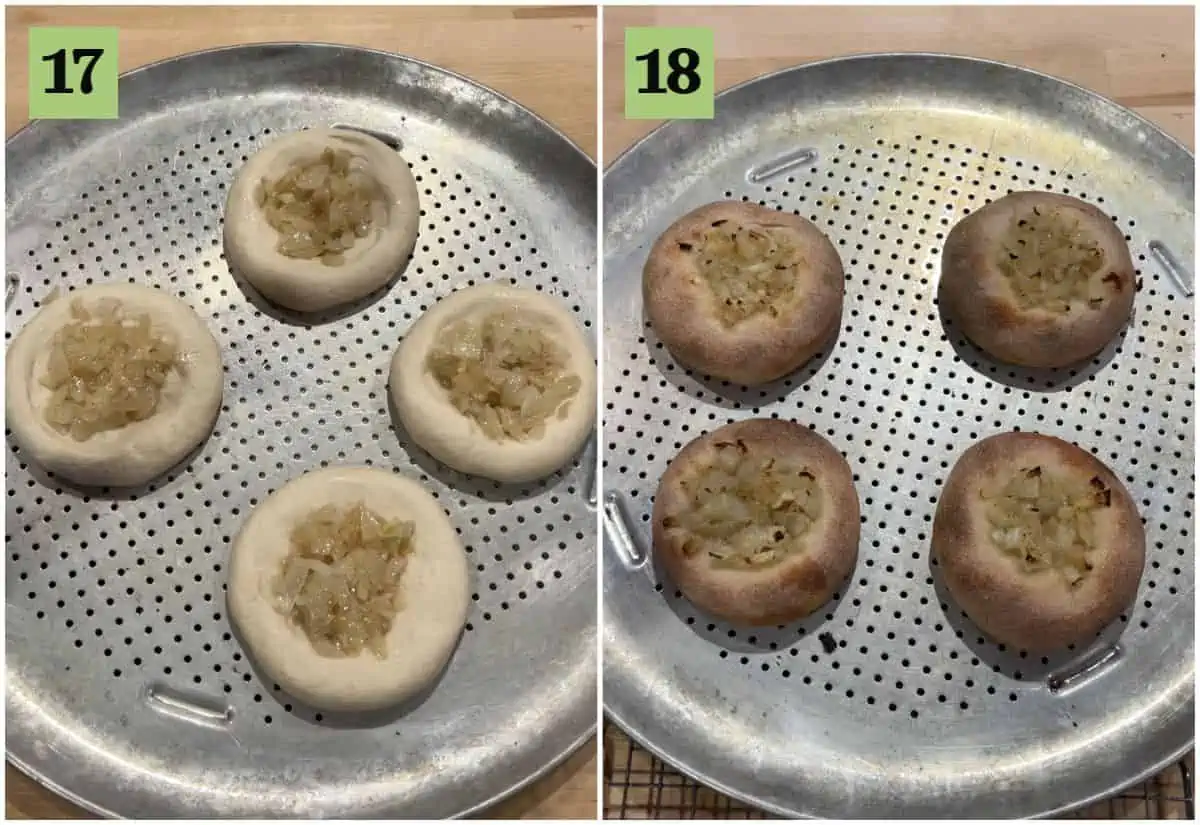
To make the dough I made my dough in a stand mixer with the dough hook attached. Add flour, instant yeast, sugar, and salt to the bowl of the mixer (1). Now slowly add the warm water and run the mixer (with the dough hook attached) in medium spend to bring the dough together. Let the dough rest (covered) for about 10 mins at this stage (2). Resting the dough allows it to absorb more water. Now again run the mixer and knead the dough well (for about 8- 10 mins) adding more water or flour (if needed). Knead until the dough is smooth and elastic, but not sticky (3). Shape the dough into a ball (4) and keep it in a well-oiled bowl to rise (5). Let it rise for about 2 hrs or until doubled in size (6). Proofing the dough in Instant Pot If baking in a hurry, we could proof the Bialy dough in an Instant pot. Place the dough in the oiled inner pot of the Instant Pot and cover it with a glass lid. Set it on yogurt function and change the heat to less heating mode. Set it for about 30 minutes and increase the time if needed. I did not proof the dough in Instant pot this time and took the traditional method of slow rising. It took about 2.5 hours for me this time, though the proofing time may vary from 1.5 to 3 hours depending on how cold it is in the kitchen. If you are not making Bialy’s right away, you could refrigerate the dough after the first rise. Make the filling In a pan, heat oil and add the chopped onions. Add the required amount of salt and let the onions cook on medium flame (7). Keep stirring the onions until they become translucent. In the past, I have allowed the onions to caramelize under deeper color but they tend to become very dark in the oven. So I just cooked the onions this time until translucent. Add the poppy seeds in the end and keep the mixture aside to let it cool to room temperature (8). Shaping the Bialys Sprinkle the work surface with flour and then place the proofed dough. Divide the dough in half (9) and then further divide each half into 4 pieces. There will be a total of 8 dough pieces (10). Try to keep them as close to size as possible. We can weigh the dough but I usually just eyeball them. Shape each part into a tight ball by shaping it a bit with your hands and then rolling it on the work surface keeping the dough within your fingers (11). Place the rolls on a lightly greased tray (12) and let it rise for about an hour more or till it leaves a depression when pressed with the fingers. Cover the tray with a cloth when rising. Once the dough has risen for the second time, it would appear puffy and will leave an indentation or depression when pressed (13). Work with one piece at a time, while we keep the others covered so they don’t dry out. When the rolls are ready, using your fingers, form a depression in the middle. Hold the roll like a steering wheel with your thumbs in the middle and your fingers around the edges (14). Pinch the dough between your thumb and fingers, rotating as you go and gradually making the depression wider without actually poking a hole through (15). This step reminded me of making the outer covering of the Kozhukattai. Once shaped the bialy will be about 4 inches wide, with the depression being about 3 inches wide and a 1-inch border. Press down the center of the bialy well, so they don’t puff up much when baking. Place the shaped Bialys on a lightly greased tray. I used my aluminum pizza plate to bake the bialys (16). We could also use a pizza stone. Make sure to preheat the pizza stone in the oven before placing the shaped bialys. Fill the depression of each bialy with the onion and poppy seeds mixture. Use about a tablespoon of filling in each Bialy. Overfilling will cause the center to not bake evenly because of the moisture in the onion. Bake the bialys in a preheated 450 F oven for about 15 mins, until they are golden brown. Cool on a cooling rack completely before storing.
Bialy topping variations
We could change up things a bit when it comes to bialy toppings. The classic bialys have caramelized onion and poppy seeds. I have seen some versions that has a little bit of breadcrumbs added. I really like that idea as the bread crumbs would help absorb the extra moisture from the onion and eventually help in even baking of the bialys. We could spice up the onion mixture that we are using as well. When I made bialys for the first time, I used some red chili and garam masala along with the onion. That added a wonderful smoky flavor. We could also use some kind of cheese. Paneer or the Indian hard cheese would be great. But add the cheese during the last few minutes of baking, so they don’t burn.
Storage instructions
Bialys are best when eaten fresh. If storing for a few hours, store them in a paper bag sealed well. Paper bag is the best to store when compared to containers or zip lock bags as they maintain the crusty texture of the bread. If storing for a longer time than a few hours, wrap the bialys in aluminum foil and then place them in a freezer bag and store it in the freezer. To thaw, heat it in preheated oven for 3 to 4 minutes or until it gets crusty.
Expert tips
Use bread flour for the best texture of the bialys. Also, slow rising the bialys is the best for texture and flavor. I made it kind of instant and didn;t let it slow rise this time, but definitely something I will be doing next time. Go easy on the onion topping as overdoing will cause the bialy to bake unevenly. Play around with the topping and use different herbs and cheese. Bialys are best when eaten immediately. So plan accordingly and if planning to store, check the storage instructions above.
Frequently asked questions
More buns and rolls
If you made this recipe and liked it, give a star rating on the recipe card or let me know in the comments below. You could also share it with me on Instagram using #MyCookingJourney and tagging me @sandhya.ramakrishnan. You could follow me and my recipes on Facebook |Instagram | Pinterest | Twitter/X
Recipe