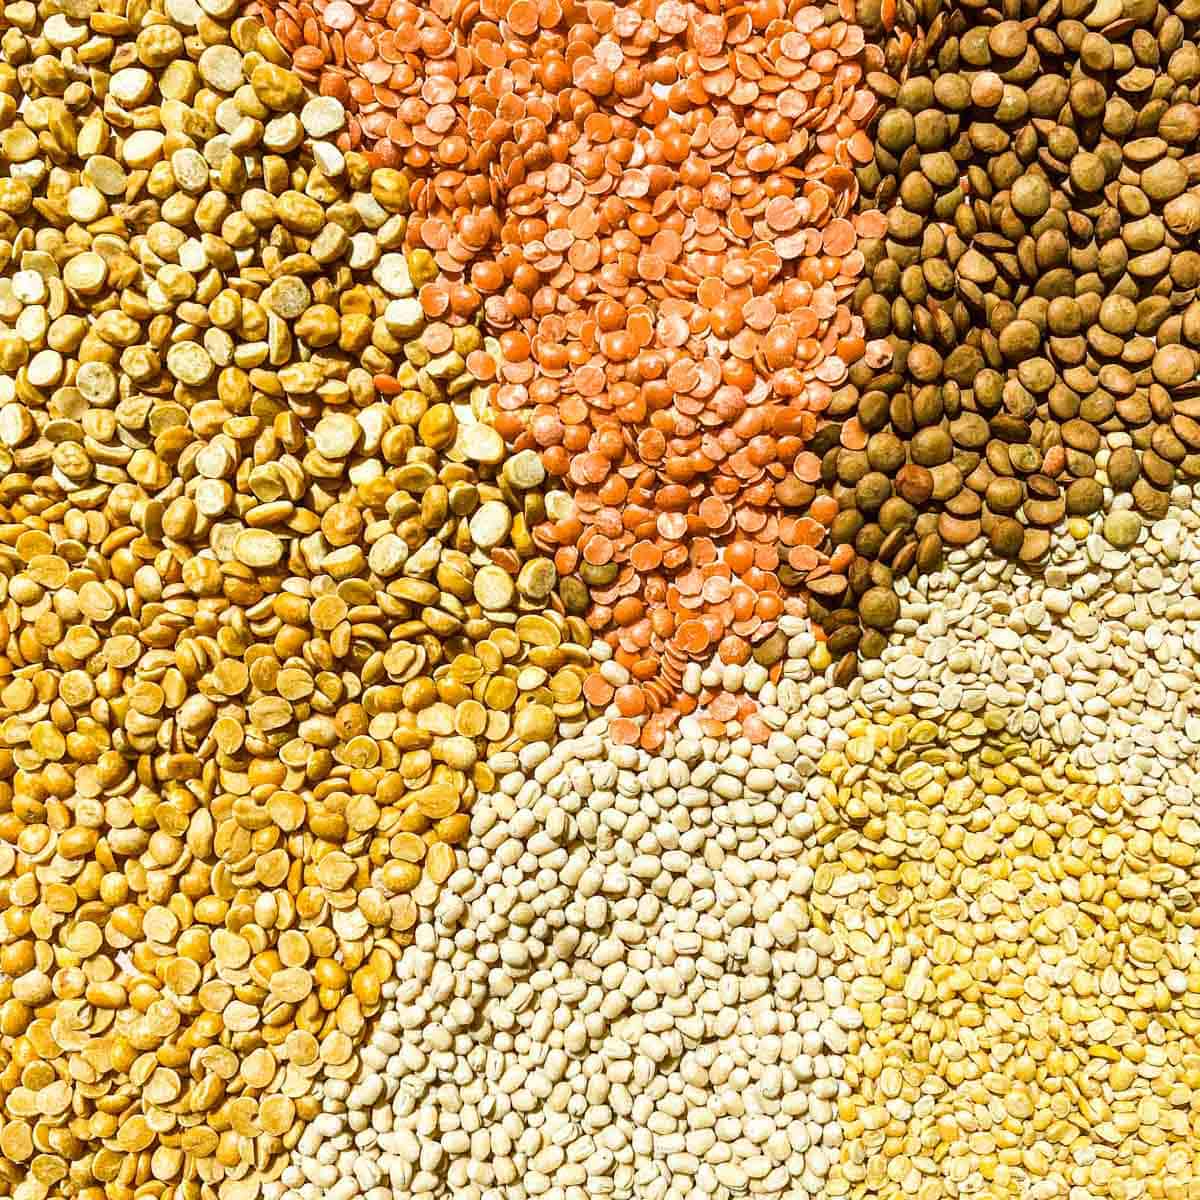
Buying the right lentil
There are various recipes or preparations of dal, some creamier and some that have a bit more texture. It is important to understand the different ways that lentils are processed and the varieties used in Indian cooking so you can buy the right variety for your preference and use case.
Whole vs. Split and Hulled vs. Unhulled Dals
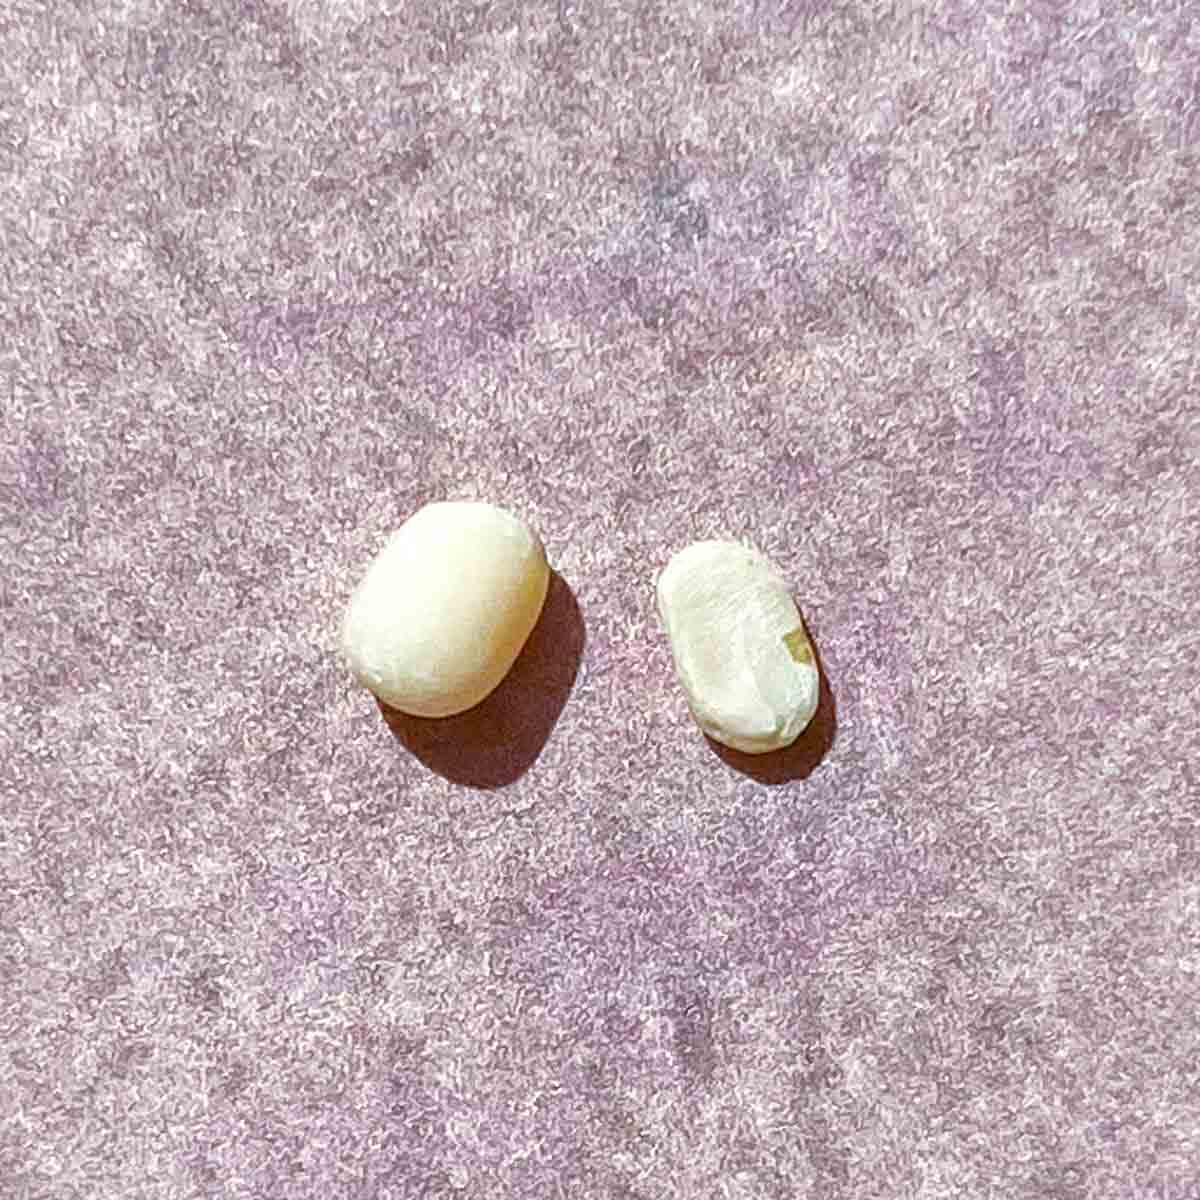
At a high level, any lentil or dal can be sold in its whole form or split into smaller discs. In addition, a lentil has an outer skin which can be hulled or removed, or the lentil can be sold un-hulled (aka with the skin on). So as a result many dals can be processed and sold in these ways:
Whole Dal, Un-hulled (Skin on) Whole Dal, Hulled (Skin off) Split Dal, Un-hulled (Skin on) Split Dal, Hulled (Skin off)
The general rule of thumb when cooking these different varieties is that:
Whole dals are thicker than split dals so they require longer cook time Whole dals retain their shape better and add texture whereas split dals tend to lose their shape and create a creamy texture in the dal recipes. Un-hulled dals (skin on) take slightly longer time to cook than hulled (skin off) dal. Hulled (skin off) dals lead to a silkier and more velvety dal compared to un-hulled dal, which have a bit of texture. Un-hulled dals add more fiber and other nutritional value to the final dish compared to hulled dals.
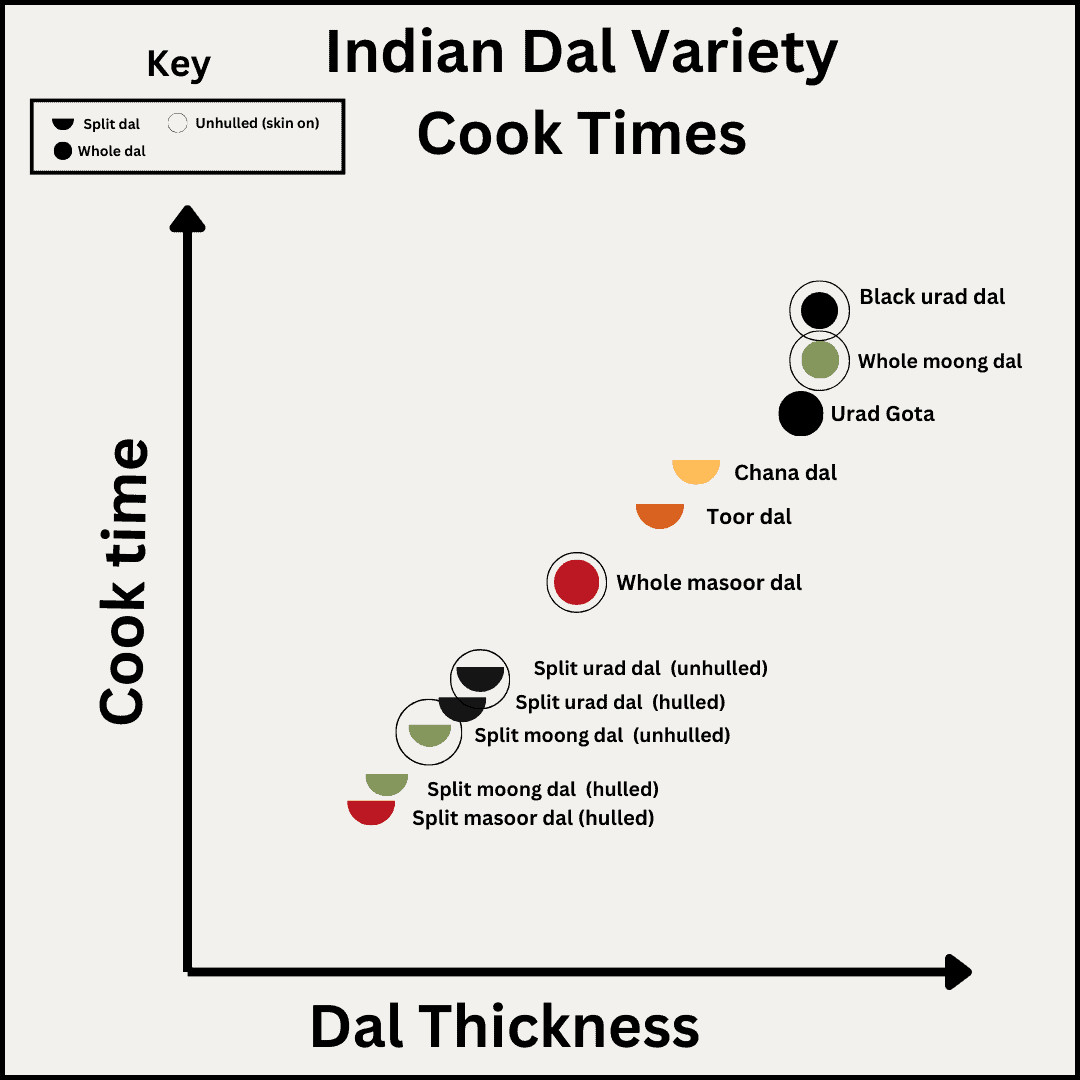
Most common varieties of dal in Indian cooking
Now that we understand the ways in which a lentil variety can be processed, we need to understand some of the most common varieties of lentils used in Indian cooking. Below are the top 5 most common varieties in Indian cooking ranked roughly in the order of thinnest to thickest: In order to learn more about each individual dal variety you can either read their detailed blog post, linked here, that goes over that variety in detail, or you can get a higher level overview in the guide to different dal varieties in Indian cooking. In general, the thinner dals cook faster whereas the thicker dals take a longer time to cook. So for each Indian dal variety, you can see up to four permutations of that variety based on how it is processed. So if we use urad dal as an example, it is sold as follows:
Black urad dal whole - Whole dal, un-hulled (skin on) White urad dal whole aka urad gota - Whole dal, hulled (skin off) Split urad dal (Skin on) - Split dal with speckles of black skin Split urad dal (Skin off) - Split dal that is white
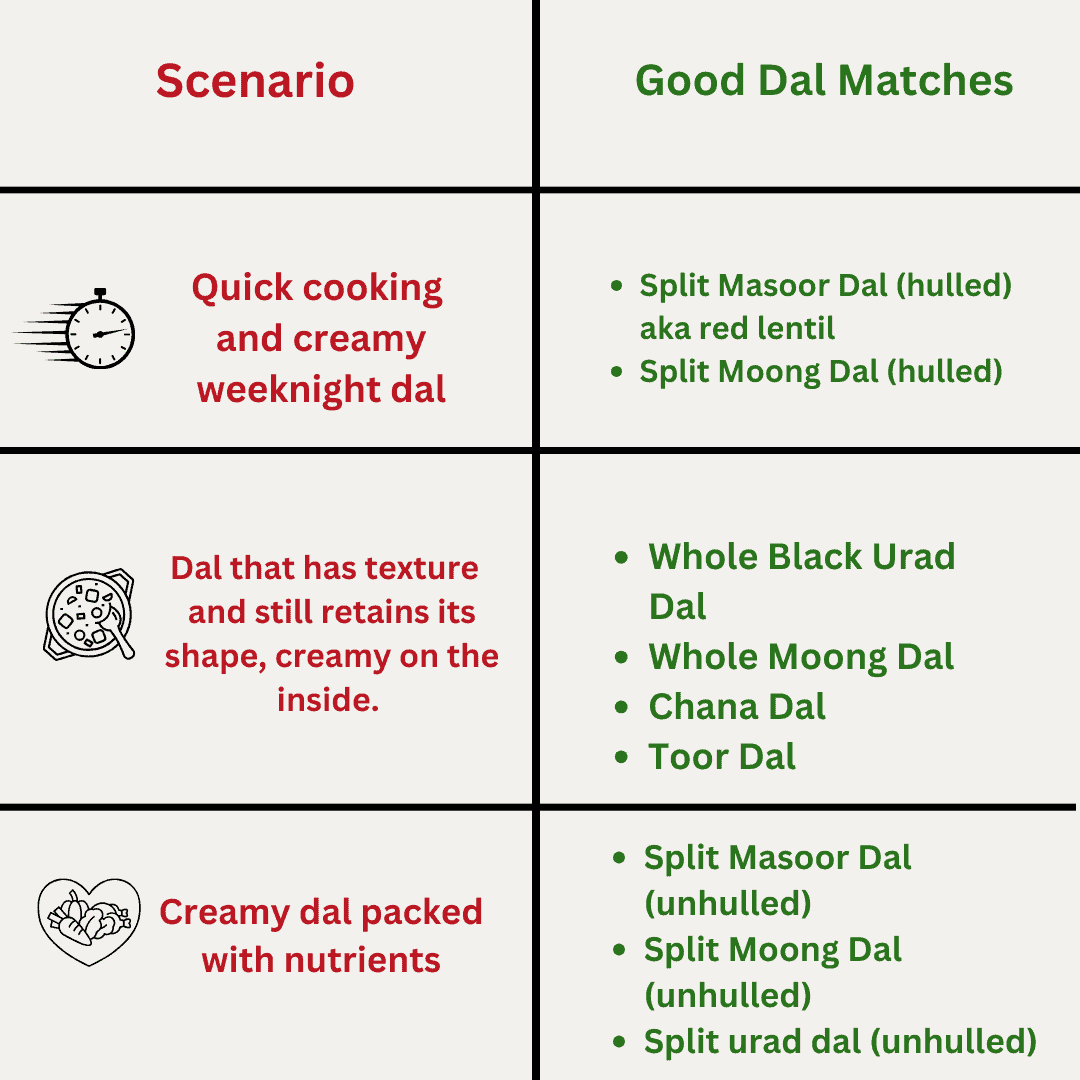
Picking the right lentil based on preference
Now let’s put all of that information together and create different goals or preferences that you have for your dal, matched with the variety that will yield that result:
Scenario # 1:
You need a weeknight dal that cooks quickly and is creamy.
Best Dal Option:
Split and hulled moong or masoor dal. Choose split and hulled masoor or moong dal since they are thinner varieties, the split version so it is creamy, and a variety with the skin removed for the velvety texture. Split and hulled toor dal is also a good back up option here but it is thicker so it requires some soaking and takes longer to cook.
Scenario # 2:
You want a dal with a creamy interior but that still retains its shape and adds texture.
Best Dal Option:
Whole black urad dal (unhulled) or split hulled chana dal. Both of these dal varieties are on the thicker side so they tend to retain their shape even after cooking. Fun fact: chana dal when not split or hulled are just chickpeas! Any other whole dal would also work here but urad dal and chana dal have the creamiest and fluffiest centers.
Scenario # 3:
You are health-conscious and want a creamy dal that is also packed with nutrients.
Best Dal Option:
Choose split moong or masoor dal that is unhulled. The skin of the dal contains fiber and other nutrients. The dal will melt into a creamy texture because it is split and because the moong and masoor varieties are thin. It won’t be as velvety as if you went with the hulled option, but the un-hulled option gives you the nutritional benefits you desire.
Overview of steps for making dal
This is a high level overview of the steps for making dal that goes over the decision making process at each step.
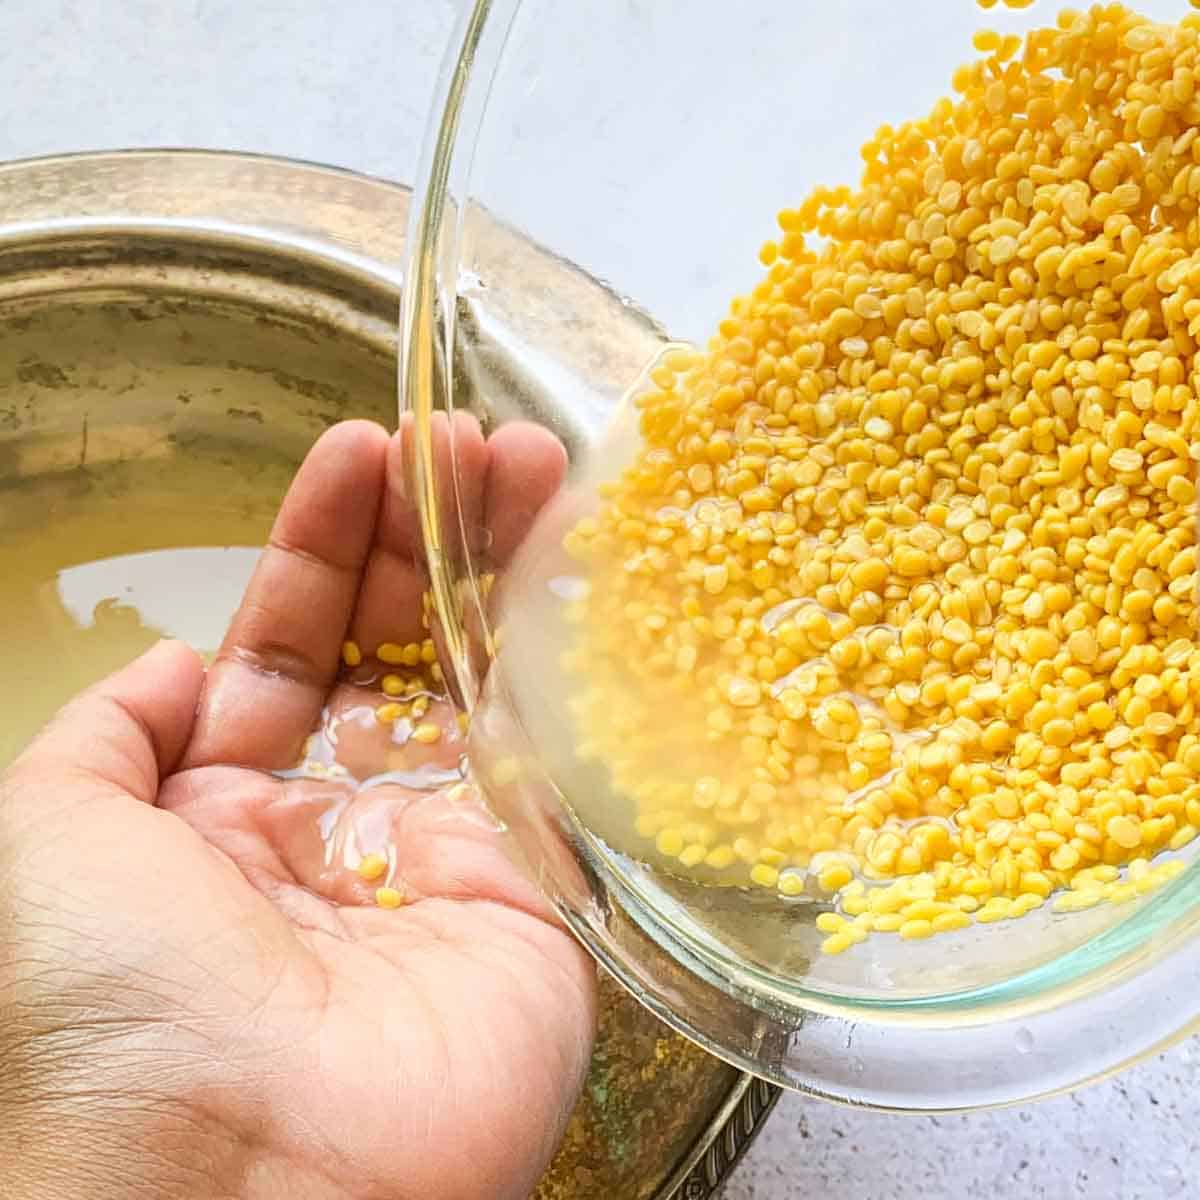
Why washing dal is important
Washing dal is the first important step that is required for making any type of dal variety. It is important to wash the dal to rid it of the accumulated dirt, pesticides, and excess starches on its exterior. Washing the dal ensures that you have a final dish that cooks evenly and with a clean flavor.
How to wash dal
There are many ways of washing dal, but my preferred way is to: Other prefer to wash dal in a mesh strainer and run the dal through running water. However, I do not prefer this method because it is hard to easily see when the dal has been washed adequately.
Why and when do you need to soak dal?
Soaking dal is sometimes an optional step and sometimes it is a step that is required. In general, soaking dal is important to help hydrate and soften the dal so that it cooks evenly and quickly. In addition, dal that has time to soak is easier to digest compared to dal that is not soaked. The rule of thumb of is that you should to soak dals that are thicker while soaking is optional for thinner dals. Practically, this means that dal that are sold whole (i.e. whole urad dal and whole moong dal) always benefit from soaking and the thicker varieties of split dals (split toor dal, split chana dal) also benefit from soaking.
How long to soak lentils for dal?
For split varieties soak the dal between 30 minutes - 4 hours. For whole dals soak the lentils between 4 hours - 8 hours (overnight). Here is a guideline of how long to soak dal varieties depending on dal variety:
Soaking optional - ~1 hour - Split Moong Dal, Split Masoor Dal, Split Urad Dal ~1 to ~2 hours - Whole Masoor Dal ~2 to ~6 hours - Toor Dal, Chana Dal ~4 hours to ~overnight - Whole Urad Dal
Pressure Cooker vs. Instant Pot vs. Stovetop Cooking Methods
There are two traditional ways of cooking dal. One is to use a pressure cooker and the other is to use the stovetop. Using the pressure cooker can be further divided into using a traditional/manual pressure cooker that sits on the stove and using an electric pressure cooker aka the Instant Pot. There are pros and cons on each of these methods and I will list them below.
Pressure Cooker (Traditional)
General How-To: Pros:
Fast cook time compared to stovetop method. Especially helpful for cooking thick varieties of dal faster. Easier to get a creamy consistency for dal. It’s much easier to get dal that is velvety and where the individual lentils melt into a smooth texture than on the stovetop. Less adjusting of water amount in the recipe compared to stovetop. Not that much evaporation occurs compared to the stovetop method, so there is less adjusting needed with water amount.
Cons:
Need specialized equipment. Need to stand by stove and regulate heat from stove (unlike with an electric pressure cooker). It is important to keep a watchful eye and stand close by to the pressure cooker so you can hear the number of whistles. Need to follow safety protocols to prevent pressure cooker from exploding. Make sure to lock/seal properly, turn off/slow down the heat after a certain whistle, and open only after depressurized; otherwise it can explode. This is one of the big things that makes beginners intimidated by the traditional pressure cooker.
Pressure Cooker (Electric - Instant Pot)
My favorite way to cook dal is using this methodology! It is the quickest and most hands-off. General How-To: Pros:
Fast cook time compared to stovetop method. Especially helpful for cooking thick varieties of dal faster. Easier to get a creamy consistency for dal. It’s much easier to get dal that is velvety and where the individual lentils melt into a smooth texture than on the stovetop. You can set it and forget it. An electric pressure cooker is self-regulating heat so you can set it like how you would a crock pot and then walk away to do other tasks. When you come back, the pressure cooker will be set to warm mode so you can finish your steps when you like! No need to worry about explosions compared to traditional pressure cooker. Less adjusting of water amount in the recipe compared to stovetop. Not that much evaporation occurs compared to the stovetop method so there is less adjusting needed with water amount.
Cons:
Need this special equipment.
Stovetop
This is a great methodology for beginner cooks who don’t want to invest in special equipment like an Instant Pot or pressure cooker. General How-To: If you are looking for a stovetop dal recipe that walks you through the steps, here is one for a simple moong dal. Pros:
No special equipment needed. Better at cooking dals where you want to retain texture of dal. Pressure cookers can often cook the dal to a creamy texture.
Cons:
Takes a longer time to cook dal compared to pressure cooker. This time is more substantial if you are cooking thicker varieties of dal. Water level needs to be adjusted as seen fit. There is much more evaporation that occurs in stovetop method compared to the closed system of a pressure cooker so water may need to be added to compensate for this. Pot needs to be watched so it doesn’t boil over.
What is the ratio of dal:water?
The ratio of water:dal is a function of how long the dal was soaked, the cooking method, and the dal variety. Here are the general rules when it comes to the amount of water needed:
The longer the dal was soaked, the less water it needs during cooking. Pressure cooking dal requires slightly less water than the stovetop method. This is because on the stovetop, even if the lid is closed there is much more evaporation than in the pressure cooking system, where evaporation is minimal. The thicker the dal variety, the more water is needed to cook the dal.
A good general rule of thumb is that the ratio is 1:3 or for every cup of dal you need 3 cups of water. This ratio can work for both thick and thin varieties of dal as long as the thick varieties are given ample soak time.
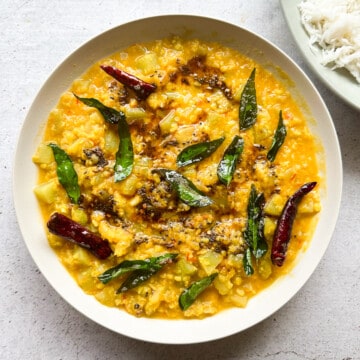
Adding extra flavor to dal with tadka
You can really add depth of flavor to the dal by adding a tadka, also known as chonk, thalipu or tempering. It is a technique used in Indian cooking where spices are added to a fat like oil or ghee so their flavors are infused into the fat. It is almost like adding a finishing oil to the dish. You can really get creative with the tadka and add any spices, but common ones include cumin seeds, mustard seeds, garlic, chilis (fresh and/or dry), and curry leaves.
Tips for making the best dal
Here are some basic tips for making a delicious dal:
Common mistakes and solutions
Why is my dal watery?
Reason: 1) You have added too much water to the dal or 2) you undercooked the dal so the lentils stand separately and the water stands separately and they don’t mix/emulsify into a creamy and thick texture. Solution: Boil the dal at a high heat for a longer time with the lid off. This will help the excess liquid boil off and help finish cooking the dal if it is undercooked so that it can become creamy.
Why is my dal foaming?
Reason: Dal generally has a lot of starches/proteins that tend to foam when boiled so this isn’t necessarily a bad thing. However, if you want to reduce the foaming from the dal, here are the solutions: Solutions: 1) Wash the excess starches of the dal out more thoroughly. 2) Add a teaspoon of oil to the pot of dal as it’s cooking. The oil creates surface tension and helps pop the starchy bubbles that form on the top. 3) Use a deeper pot when cooking the dal to prevent the foam from overflowing.
Why is my dal mushy?
Reason/Solution: A lot of Indian dal preparations are looking for a consistency where the lentils meld into a homogenized creamy texture and lose their shape. So it’s important to set expectations that sometimes this is the goal in most moong dal or masoor dal recipes. However, if you are looking for dal with a bit more bite either buy a whole version of the lentil instead of split OR buy the split version that is un-hulled (with skin on) OR cook the dal for less time than called for in the recipe.
Why is my dal bitter?
Reason: Some potential reasons your dal might be bitter are 1) You added too much turmeric or 2) when you added spices like mustard seeds into oil, you burned them, which added a bitter taste to the dal. Solution: Once this mistake is already made, the way to counteract the bitterness is by adding some sweetness and some fat to the dish. So add increments of ¼ teaspoon of sugar to the dal along with fats like ghee or butter to help temper the bitterness of the dish.
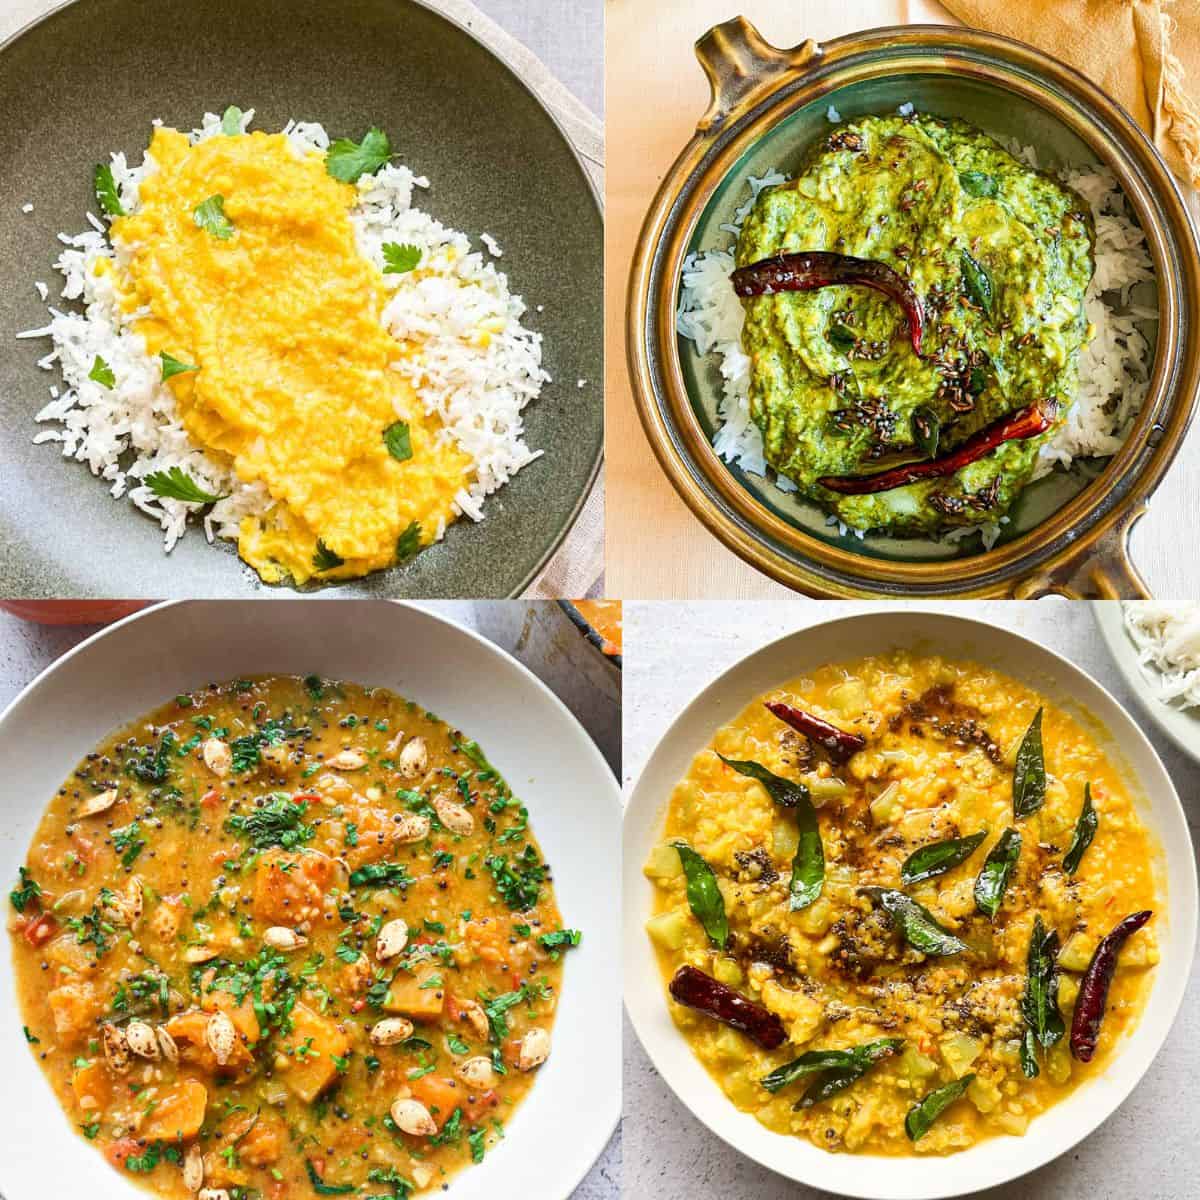
Recipes for dal in varying difficulty
These are recipes that utilize the techniques of making dal. They are ordered from easiest (simple moong dal) to hardest (pumpkin sambar). Each of these recipes can help you master the art of making dal. Even though some say that it is stovetop, you can use the principles taught here to make them in the Instant Pot or vice versa! I hope you enjoyed this deep dive of cooking and making dal! Please leave a comment below letting me know what you thought of this article and if it was helpful to you! I always love hearing your questions and your comments 🙂