Pro Tips for Amazing Pumpkin Cake
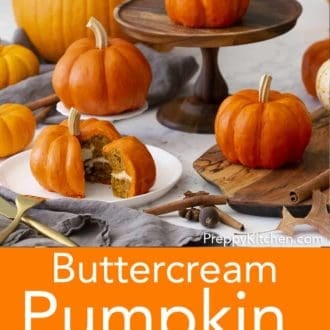
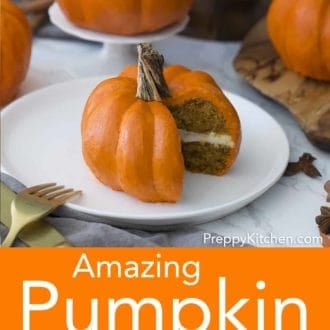
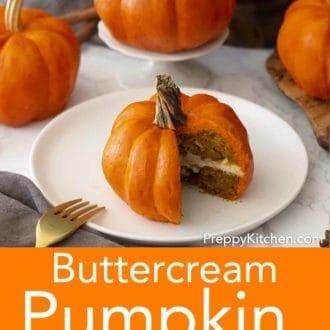
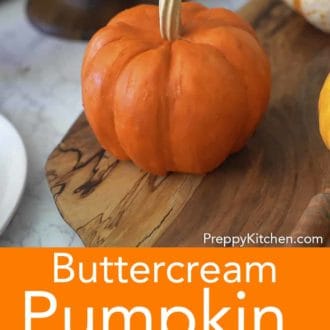
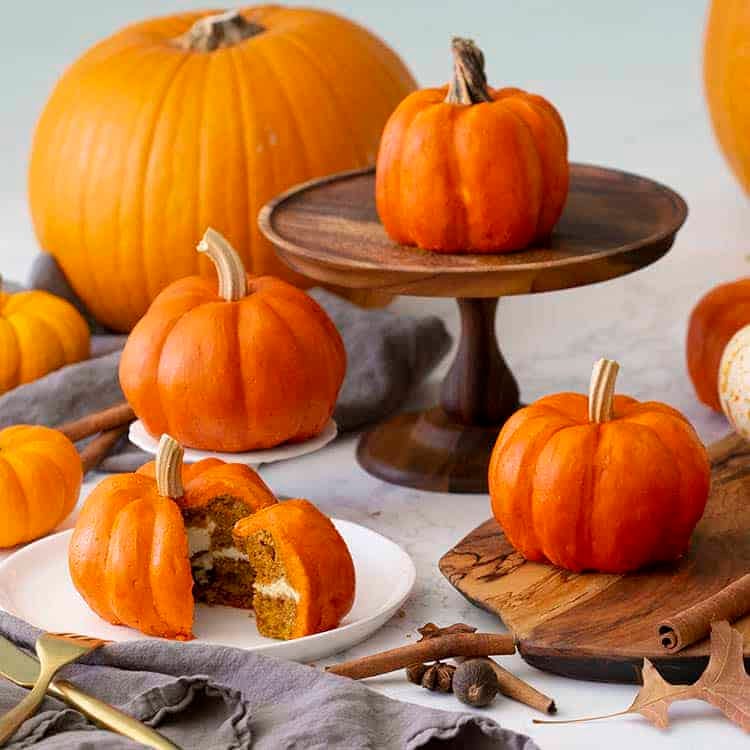
I used real pumpkin stems for these cakes to give the most realistic appearance. I just bought a “Cinderella” pumpkin because they have a long stem then cut a few segments off with some garden clippers. You could also make the stems from some fondant or thick buttercream, but it wouldn’t look quite as real and takes more time. The KEY to decorating these cakes is to chill them after you apply and smooth the buttercream. Once chilled you can do some sculpting and then chill again if the cake softens up too much. The best shaping tool I can recommend is a yogurt container you cut into half circles and rounded points. These pieces will flex and give you better control when shaping and smoothing the pumpkins. Measure your flour correctly! Adding too much flour to the recipe is the most common mistake. The best, and easiest way to measure flour is by using a scale. If you don’t have one then fluff your flour with a spoon, sprinkle it into your measuring cup, and use a knife to level it off. After you cover your cakes in buttercream, I recommend chilling them in the fridge for about 20 minutes so they will be easier to sculpt. If you’re making a bunch of them you can have a little assembly line going with cakes coming into and out of the fridge.
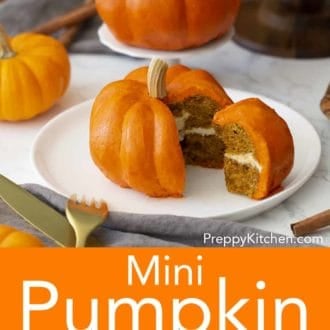
I love the way these cakes look “naked”! If you want a cute and FAST version on these then sandwich the bundts together with the cream cheese frosting, and pour a glaze on top. You can finish them off by adding the pumpkin stems or leave as is.
Alternate Glaze Recipe if you’re not a buttercream fan:
Sift powdered sugar and spiced into a bowl. Drizzle in milk and mix until desired consistency is reached.
3 cups powdered sugar 1/2 tsp cinnamon 1/4 tsp ginger 1/4 tsp allspice 1 pinch cardamom 4-8 tablespoons milk 2-4 drops orange food coloring (optional)
Steps to Make Pumpkin Cake
- Sift the flour, salt, spices, and leavening agents into a large bowl. Whisk together and set aside.
- Cream the butter and oils together then beat in the yogurt and eggs. Mix in the dry ingredients alternating with the pumpkin purée and beat until combined. Scrape the bowl down and mix and stray pockets of ingredients in by hand.
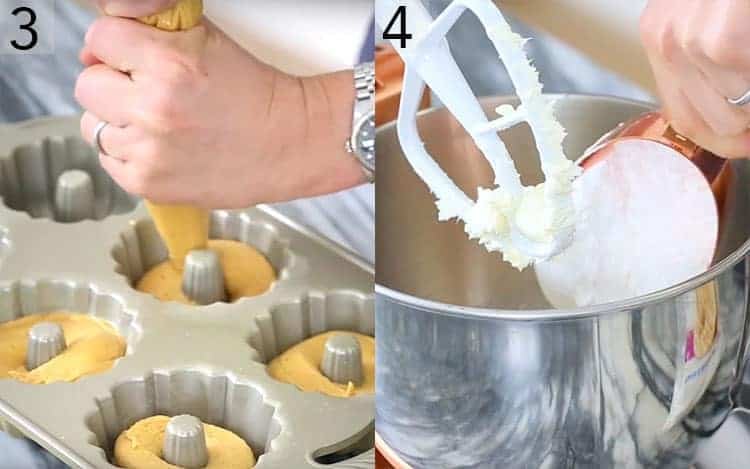
Pipe the batter into the buttered and floured mini bundt pans then bake at 350F until centers are set, about 20 minutes. 4. Make the cream cheese frosting then whip up the buttercream and color orange if desired. I’ve had many people make white pumpkins so they can skip the food coloring.
Cut bottoms off cakes (less if you want tall pumpkins, more if you want rounder ones).
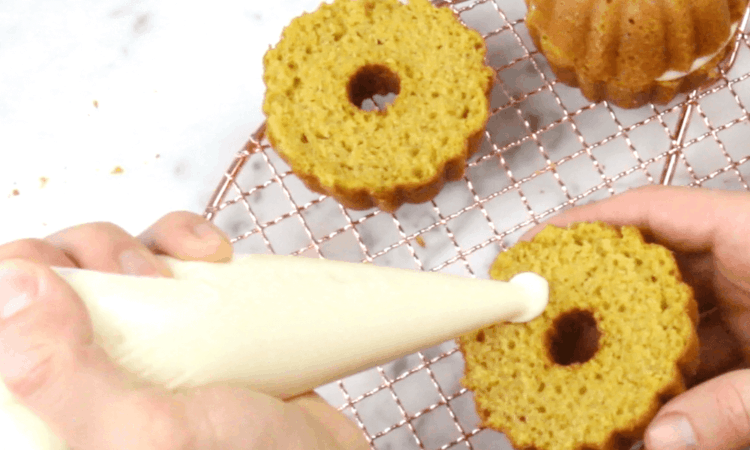
Pipe or smear cream cheese frosting onto the bottom of one mini bundt cake and sandwich together. Fill in the hole on top with a bit of the bunt cake you trimmed off in the precious step.
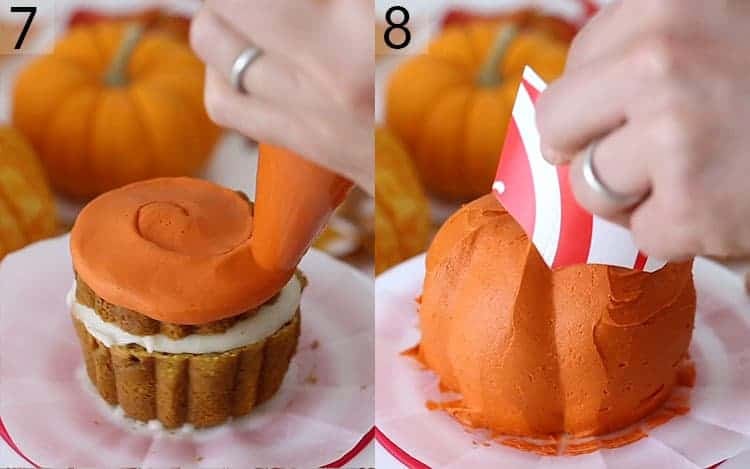
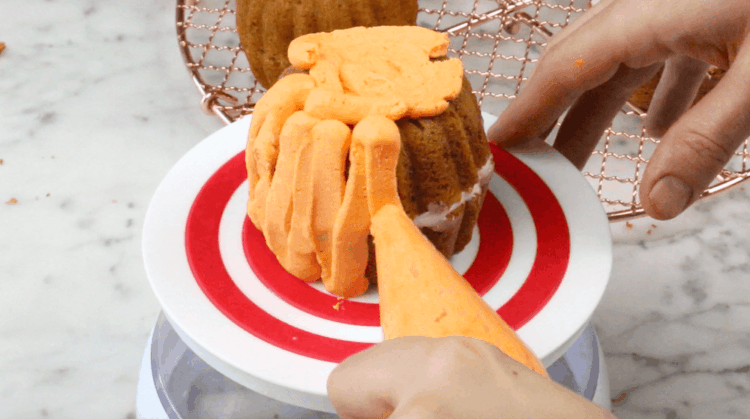
Cover in orange buttercream. I like to work on a piece of parchment paper so I can move the cakes around easily.
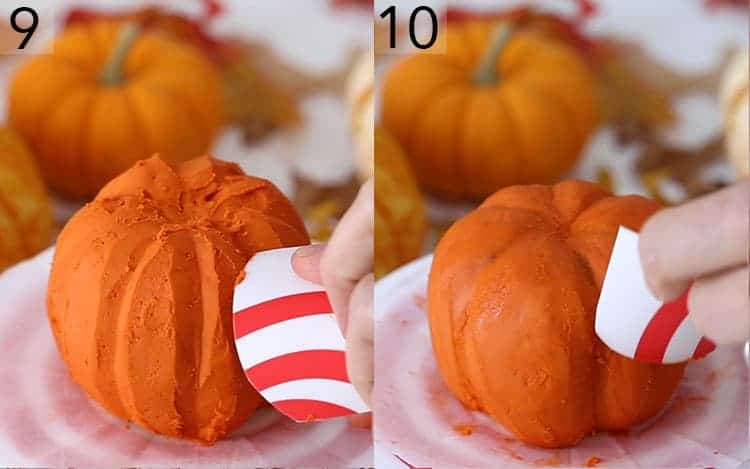
Sculpt into a pumpkin shape. (I cut a yogurt container up to make my shaping tools. The best ones were a rounded off “V” to scrape the indents and a straight edge to sooth the sides)
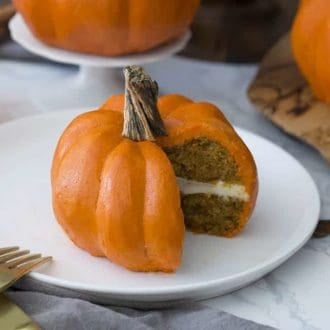
9. Chill the cakes to harden the buttercream then use a rounded piece of plastic to smooth the pumpkin out further. 10. The final smoothing will need a bit of water to moisten the outside. You can use a damp paper towel, your clean fingers, or a smoothing tool to give the cakes a final smooth. The quickest way is to smooth with your wet, clean hands. Top each pumpkin with a stem. I used a real pumpkin stem but you can make one from fondant, modeling chocolate or even very thick buttercream.
IF YOU LIKED THIS RECIPE TRY THESE OUT
Cute Pumpkin Cupcakes Brown Butter Pumpkin Sheet Cake Pumpkin Cupcakes Pumpkin Pecan Cinnamon Rolls My Favorite Pumpkin Pie If you’ve tried this pumpkin cake recipe then don’t forget to leave a rating and let me know how you got on in the comments below, I love hearing from you!