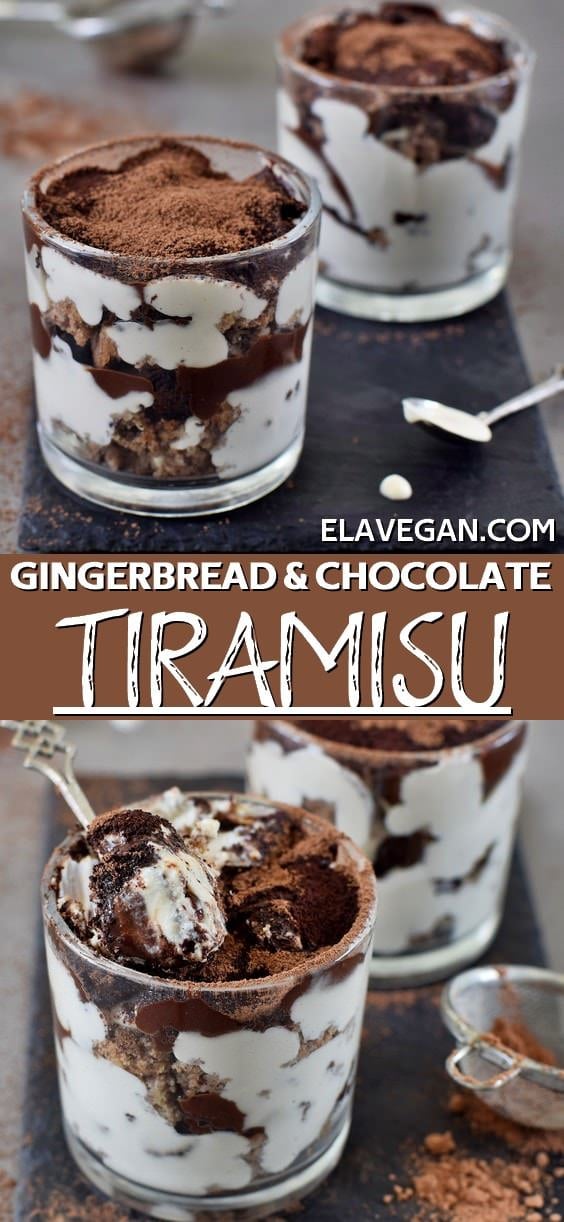
Fuss-Free Vegan Individual Tiramisu Cups
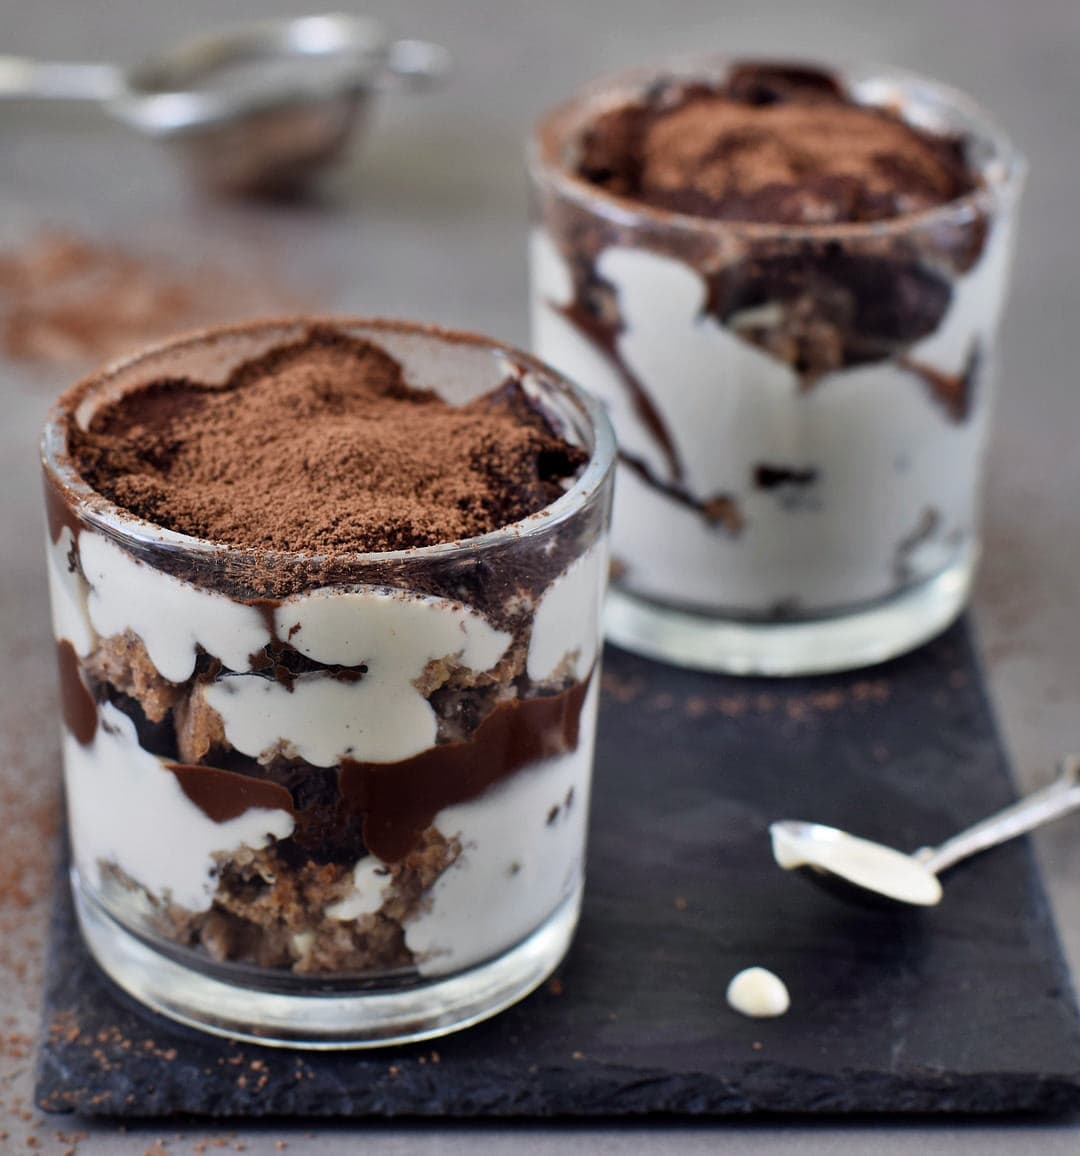
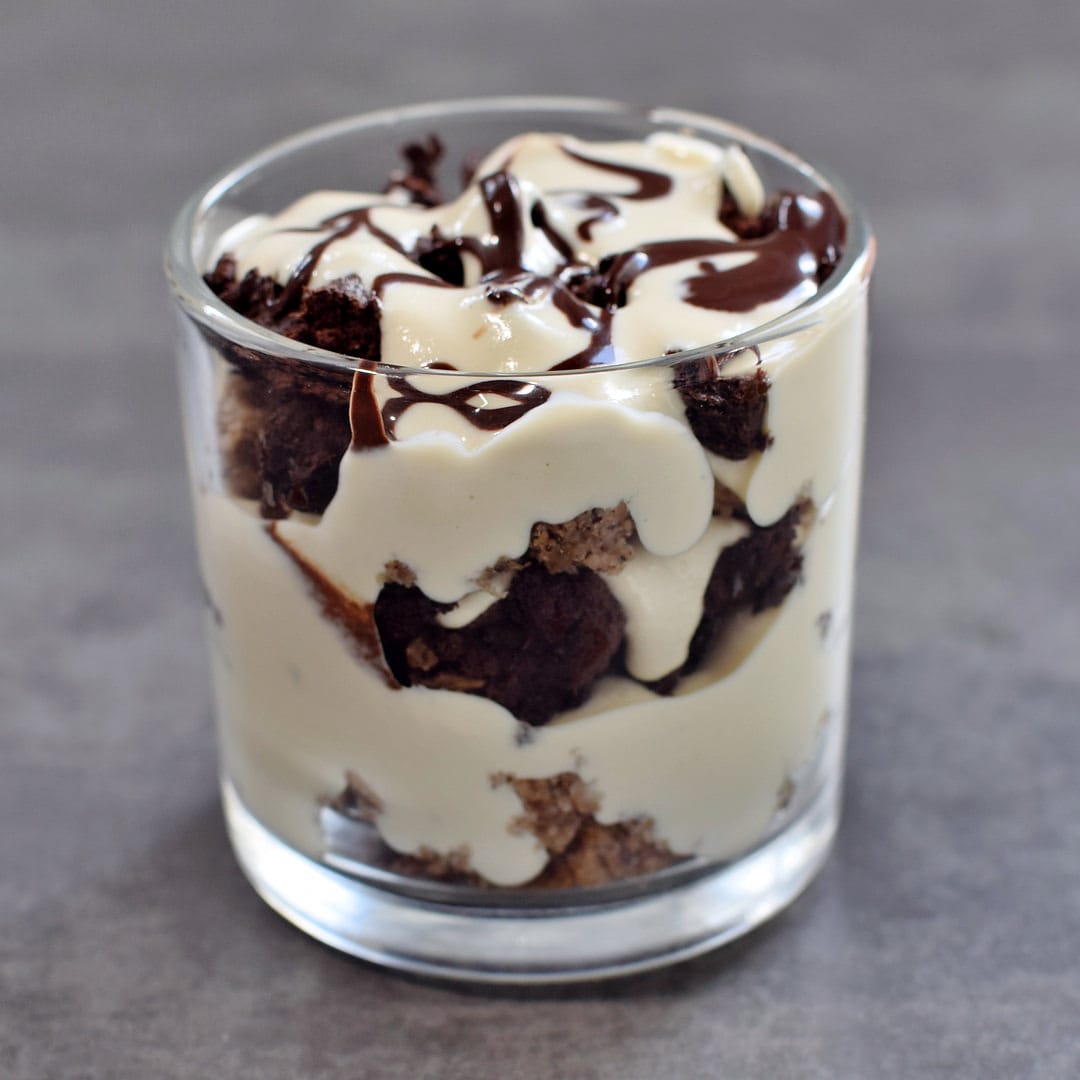
These individual tiramisu cups contain all the elements in a classic tiramisu turned into an easy, low-effort, individual-serving dessert. As much as I LOVE regular casserole-dish style tiramisu, it isn’t exactly the ‘throw together’ dessert I often feel like making. Luckily, these mini tiramisu cups are layered in individual-serve glasses/jars, meaning no need to worry about the mascarpone cream layer setting (thus, no long setting time after assembly), structural integrity, or clean slices. Instead, your family and friends can use spoons to dig right into these ‘tiramisu trifles.’ This tiramisu version is also 100% refined sugar-free, lower fat, gluten-free, dairy-free, and egg-free! Not to mention that it’s incredibly versatile. For example, this version uses a combination of homemade gingerbread cake and optional also brownies (Healthy Vegan Brownies or these Vegan Sweet Potato Brownies) as the ‘cake’ layers- perfect for the holidays! However, these can easily be swapped out for a gluten-free vegan sponge, regular ladyfingers, etc.! Then, it tops that up with a silken tofu-based mascarpone layer (soy-free option included) and a simple chocolate layer for ultimate indulgence. Best of all, you can enjoy these vegan tiramisu cups almost immediately after their assembly (though a short 30-minute time for the flavors to meld is always a good thing). The individual cups are a fantastic, mess-free, crowd-pleasing dessert for dinner parties, BBQs, picnics, and other large gatherings! And if you’re looking for more single-serve desserts, you might also enjoy this peanut butter mousse, chocolate mousse, a chocolate mini cream cake, vegan banana pudding, or even mini blueberry galette!
Ingredients & Substitutes
The Biscuit/Cake Layer
What you use for this is super versatile based on the time of the year, event, flavor preferences, etc. A few options include:
Gingerbread-brownie tiramisu: This version is for a gingerbread-brownie tiramisu which combines homemade soft gingerbread (ingredients in recipe card) and homemade chocolate brownies (using either Healthy Vegan Brownies, Vegan Sweet Potato Brownies, or your favorite brownies)—both of which will make a gluten-free tiramisu, too! Gingerbread biscuits: Use leftover gingerbread cookies dipped in a coffee mixture for another delicious Christmas tiramisu. Brownie tiramisu: Skip the gingerbread layer entirely and just use brownies to create a delicious chocolate tiramisu. Gluten-free, vegan sponge cake: Follow the recipe in my regular tiramisu recipe for simple, fluffy sponge cake fingers for this vegan tiramisu recipe.
You can also use store-bought ladyfingers, though finding vegan and/or gluten-free options can be tricky.
The Cream Layer
Unlike a regular cheesecake, these dairy-free tiramisu cups don’t need a firm, settable cream, making the process much more straightforward and simple. All you need for this layer is:
Silken tofu: This will provide a super silky, creamy base similar to mascarpone cream (without tasting like tofu). Use firm silken tofu and not a regular medium/firm tofu (unless necessary- but I don’t recommend it) as the flavor and texture will vary. Check the recipe variations section below for a tofu-free version. Maple syrup: Or the liquid sweetener of your choice (like agave, brown rice syrup, date syrup, malt syrup, etc.). Coconut milk: Use full-fat canned coconut milk for the creamiest results. Vanilla extract: Use natural, pure vanilla for the best flavor. Coconut oil: Will help to thicken the mixture once chilled. Instant espresso powder: Or 2-3 tsp of strong coffee/espresso. Adjust the amount to personal taste. Salt: Just a pinch of salt will enhance the various flavors in the cream layer.
The Chocolate Layer
This simple, refined sugar-free chocolate layer infuses the healthy tiramisu cups with more chocolate flavor than a simple dusting of cocoa at the end and really takes it to the next level.
Cocoa powder: You can use unsweetened cocoa powder OR cacao powder (though the latter is more bitter, it’s also packed with more antioxidants and nutrients). Maple syrup: Or the liquid sweetener of your choice. Coconut oil: In a melted consistency. Espresso powder: A pinch will enhance the chocolate flavor without tasting like coffee. A little more, and you’ll have a delicious mocha layer. Salt: Just a pinch to enhance the cocoa flavor.
Optional add-ins & Recipe Variations
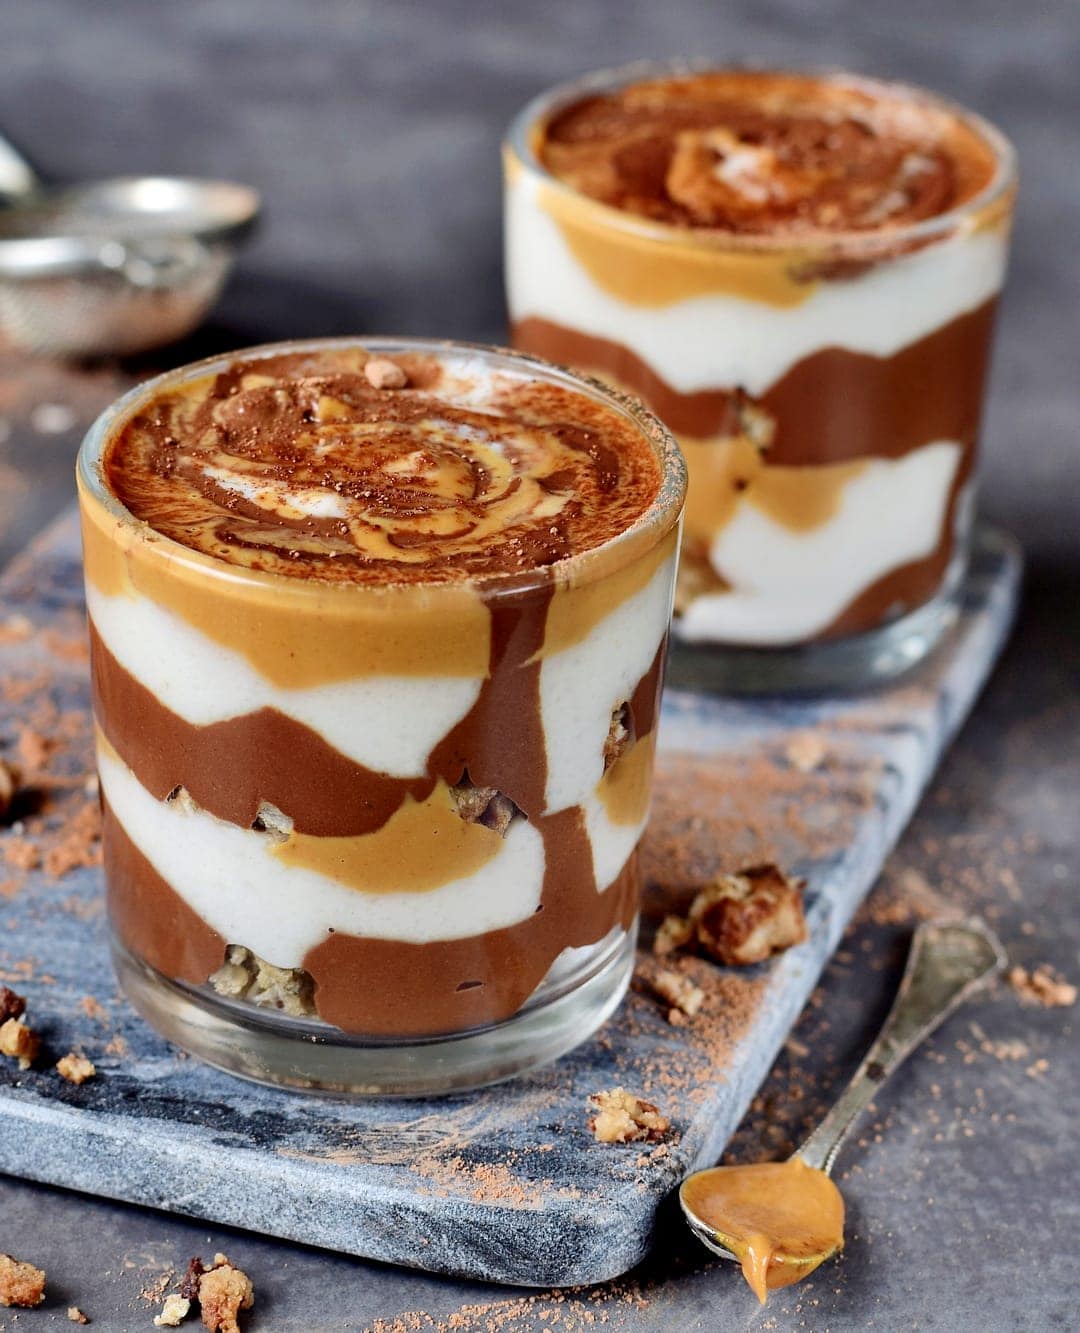
Citrus zest: 1-2 tsp of orange and/or lemon zest added to the cream layer will add depth of flavor and works with a classic or gingerbread Christmas tiramisu. Soy-free version: If you want to make the vegan mascarpone mixture without tofu, use cashew cream (about 1 ½ cups of soaked cashews blended with water), extra coconut cream, or vegan cream cheese. Nut–free: The gingerbread contains almond flour. However, you can substitute that with ground sunflower seeds (or hemp seeds, though they have a stronger flavor). Flavor: Coffee liqueur like Kahlua, vegan Baileys, amaretto, marsala wine, dark rum, brandy, etc. will add a nice flavor. I prefer to brush it over the cake layers to avoid oversoaking it. Caffeine–free: Use caffeine-free coffee OR swap out the coffee for hot cocoa. Chocolate cream: Add some melted semi-sweet chocolate to the cream mixture if you want even more of a chocolate treat. I haven’t tried this, so I can’t recommend exact amounts. Peanut butter: Layer the dessert with a few spoons of melted peanut butter (see next photo).
Please read the recipe card below for the full ingredients list, measurements, complete recipe method, and nutritional information.
How to Make Individual Tiramisu Cups?
Step 1: Prepare the cake/biscuit layer
First, you’ll need to prepare the biscuit/cake recipes of your choice. For this option, I’ve used homemade gingerbread (recipe below) and chocolate brownies (optional). To prepare the gingerbread layer:
First, add all the dry ingredients to one mixing bowl and the wet ingredients to a separate bowl and stir/whisk the contents of each bowl well. Then, pour the wet ingredients into the large bowl with the dry and whisk until combined.
This recipe contains no gluten, so you don’t have to worry about overworking the gluten. However, it’s still best not to overbeat the mixture for too long.
Then, pour the gingerbread batter into a muffin tray and bake at 375F/190C for between 25-35 minutes, until a toothpick inserted in the center comes out clean.
You can use a regular large baking dish, too. The baking time will vary, so check the doneness with the toothpick method. Once ready, set the gingerbread aside to cool.
Step 2: Prepare the vegan cream layer
Add all cream layer ingredients to a blender and process until smooth and creamy.
If the silken tofu you’re using isn’t firm, it’s best to use less coconut milk. I recommend only adding half to begin and then increasing to the desired consistency. Instead of using the coffee in the cream layer, you could omit it and, instead, drizzle/brush over each cake layer with some strong (room temp or chilled) coffee/espresso.
Step 3: Prepare the chocolate layer
Combine all the ingredients in a small bowl and whisk well. If it’s too thick, add a little more maple syrup. If it’s too thin, add a little more cocoa powder.
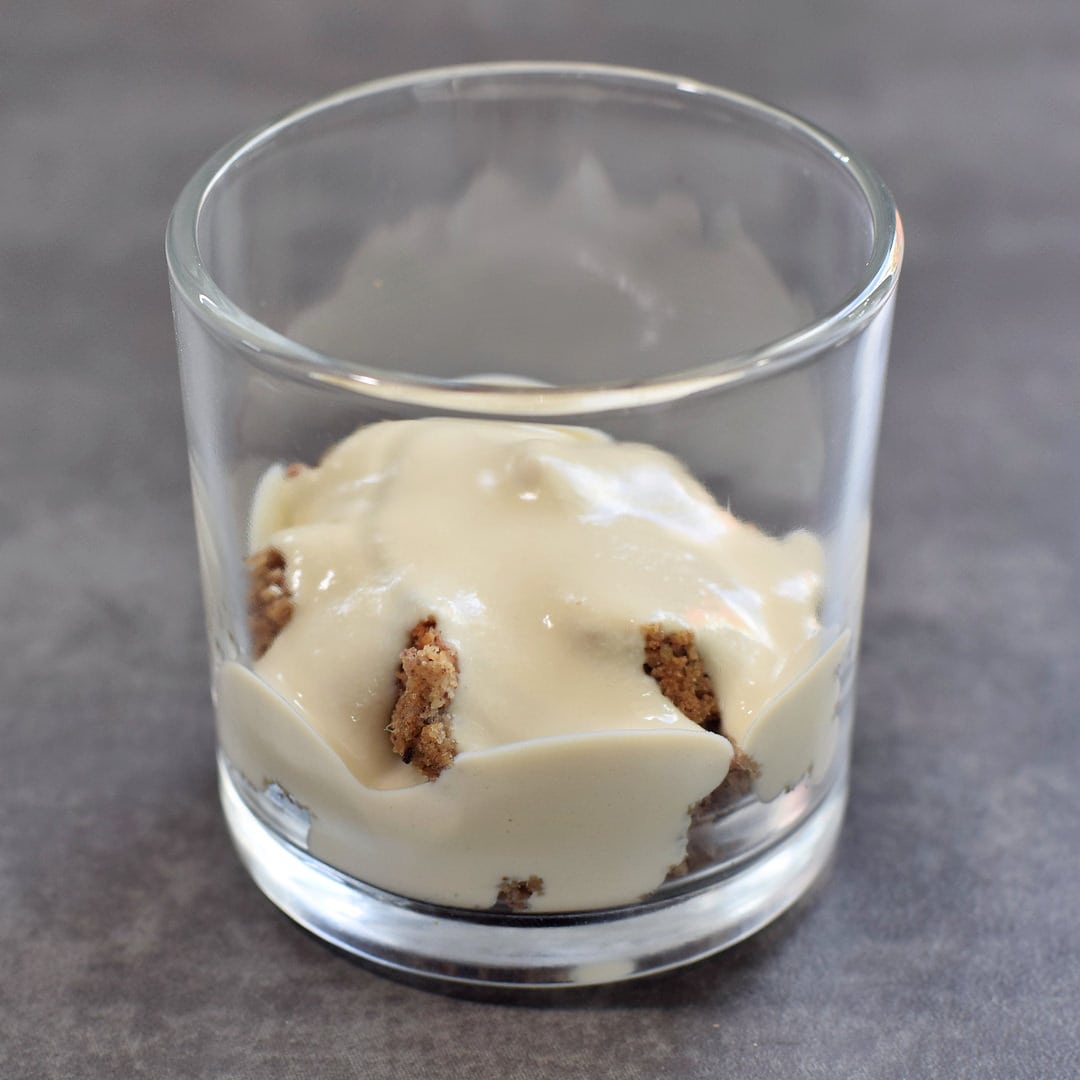
Step 4: Assemble the tiramisu
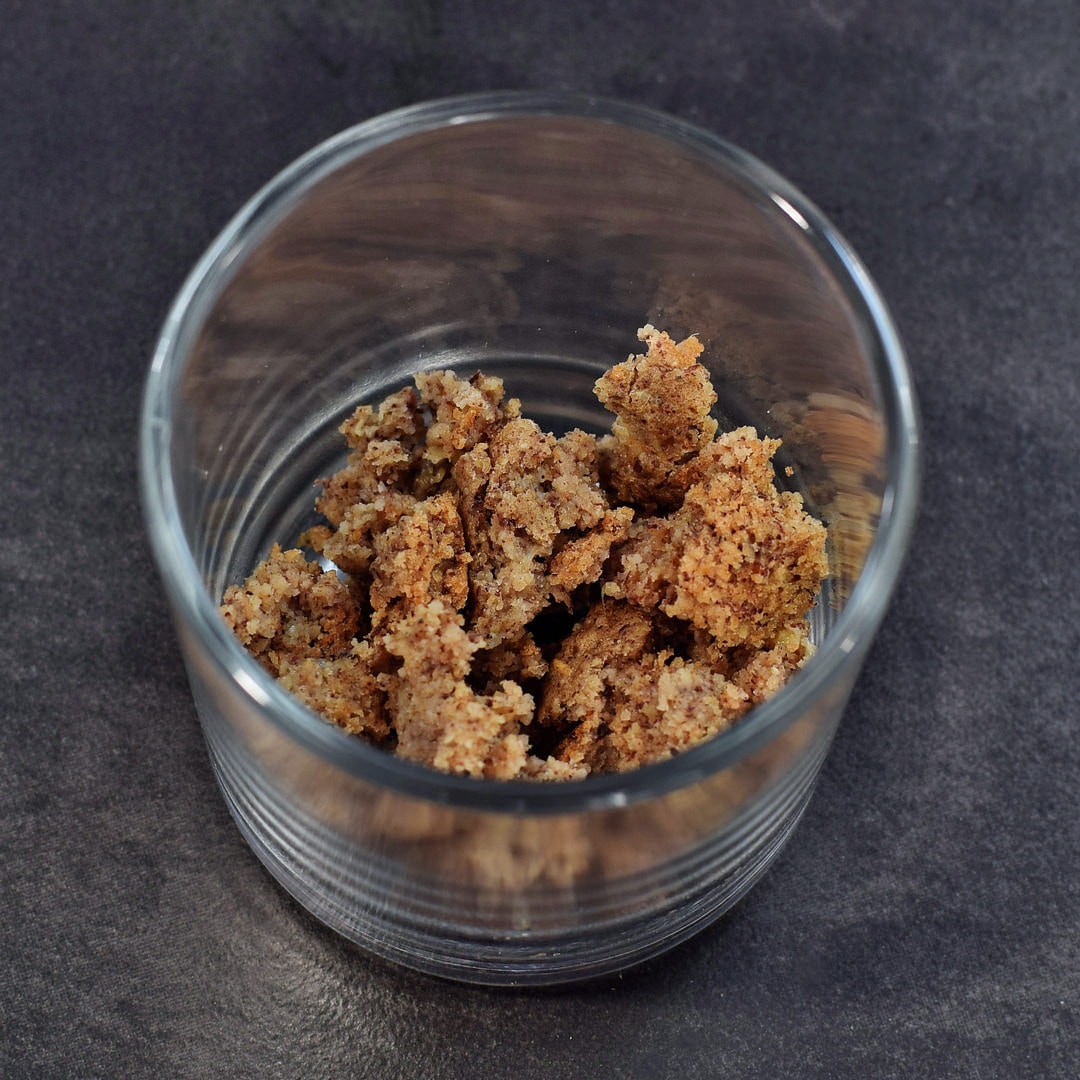
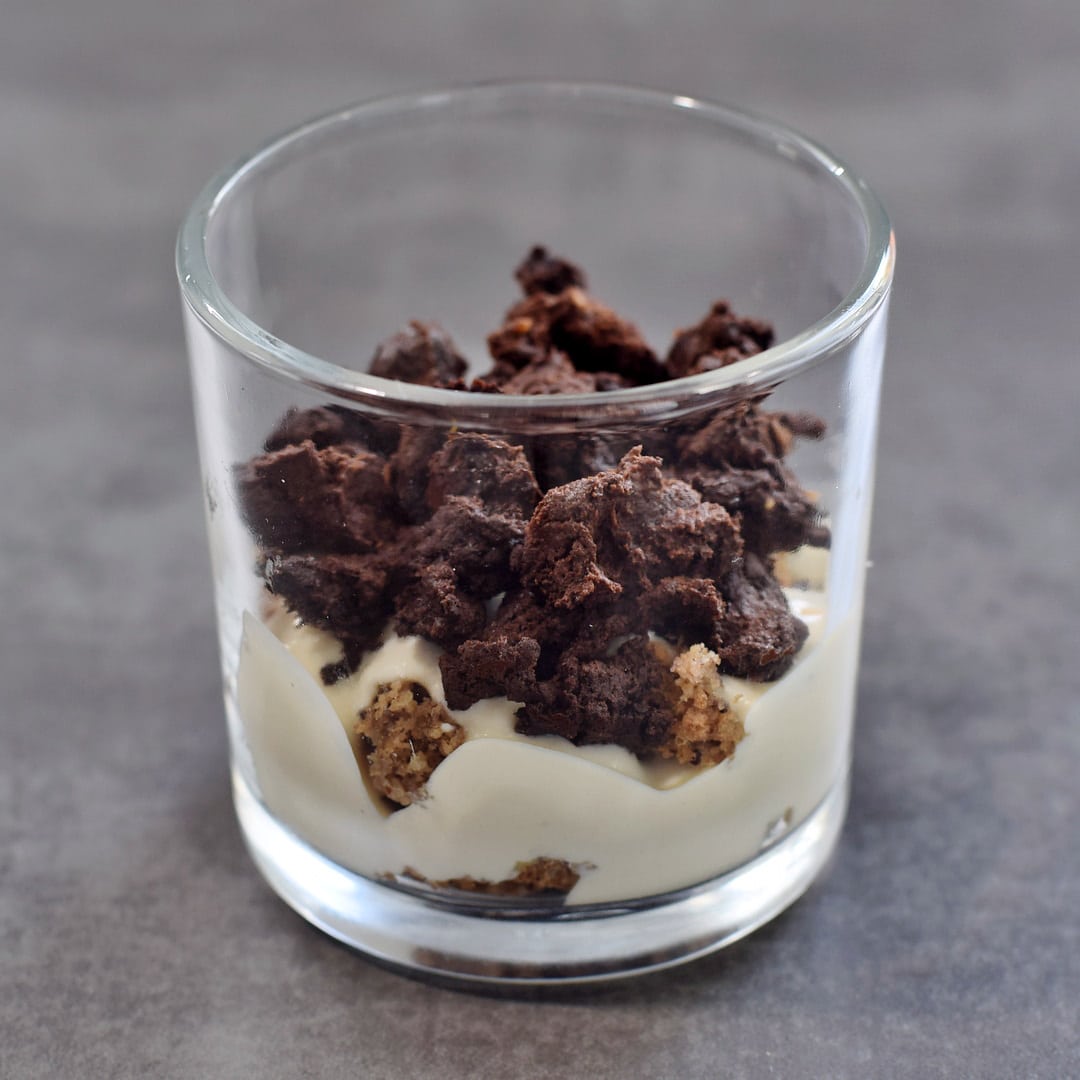
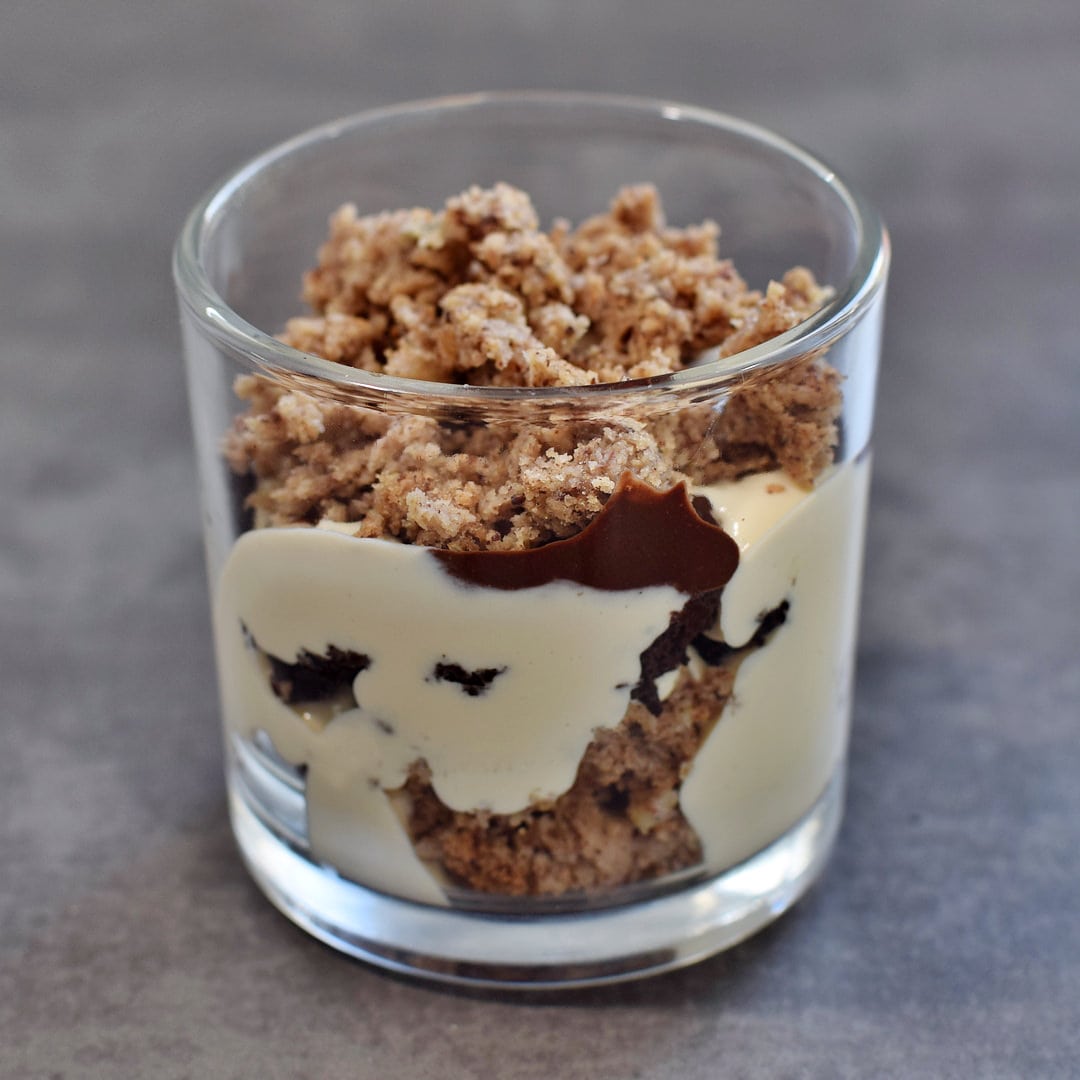
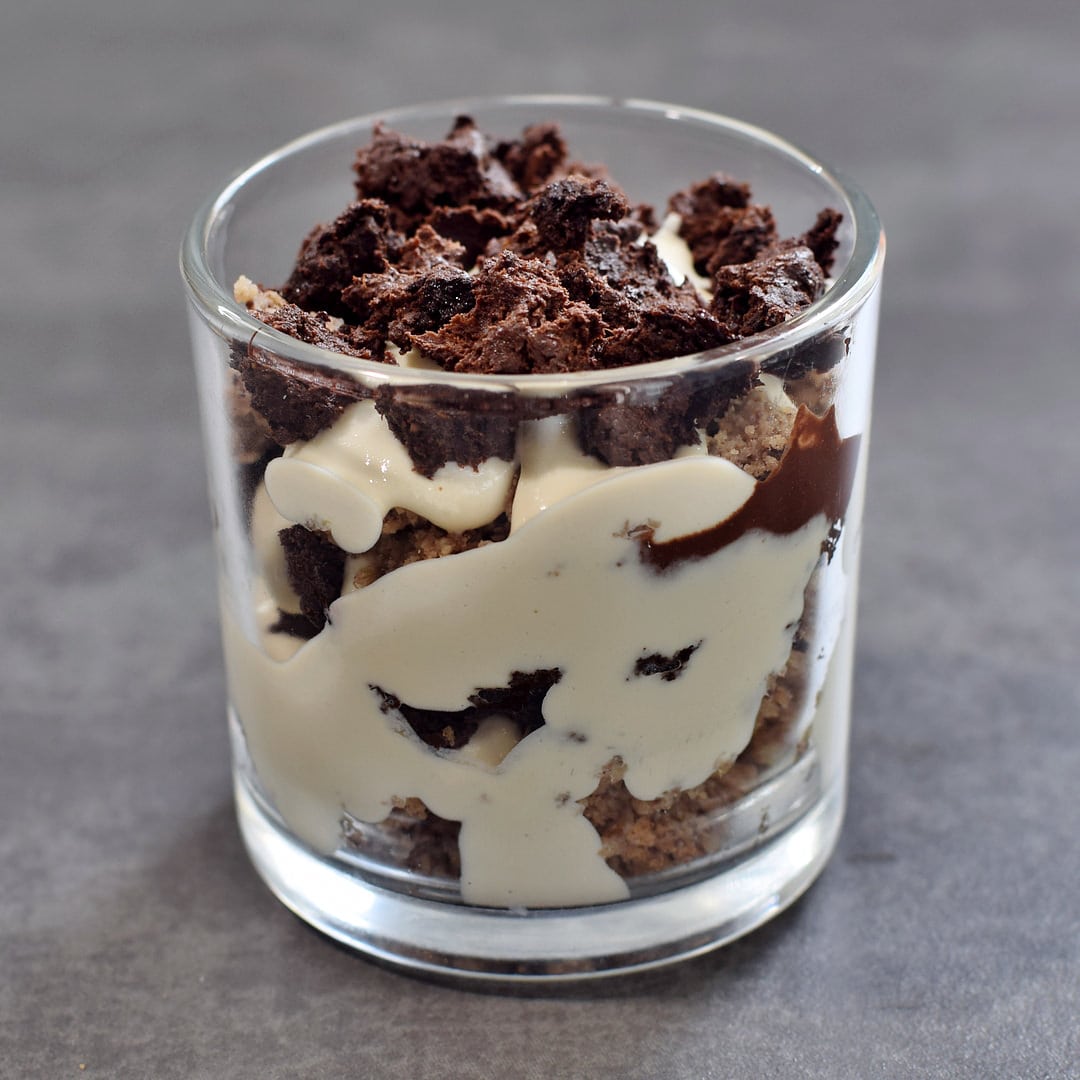
When it comes time to assemble the vegan tiramisu in a cup/jar, I use: 1-inch layer of crumbled cake (I used gingerbread for this layer).
2-3 tablespoons of the cream
1-inch layer of crumbled brownie (or use more cake)
Another layer of cream 2 tablespoons of chocolate sauce Another layer of cake
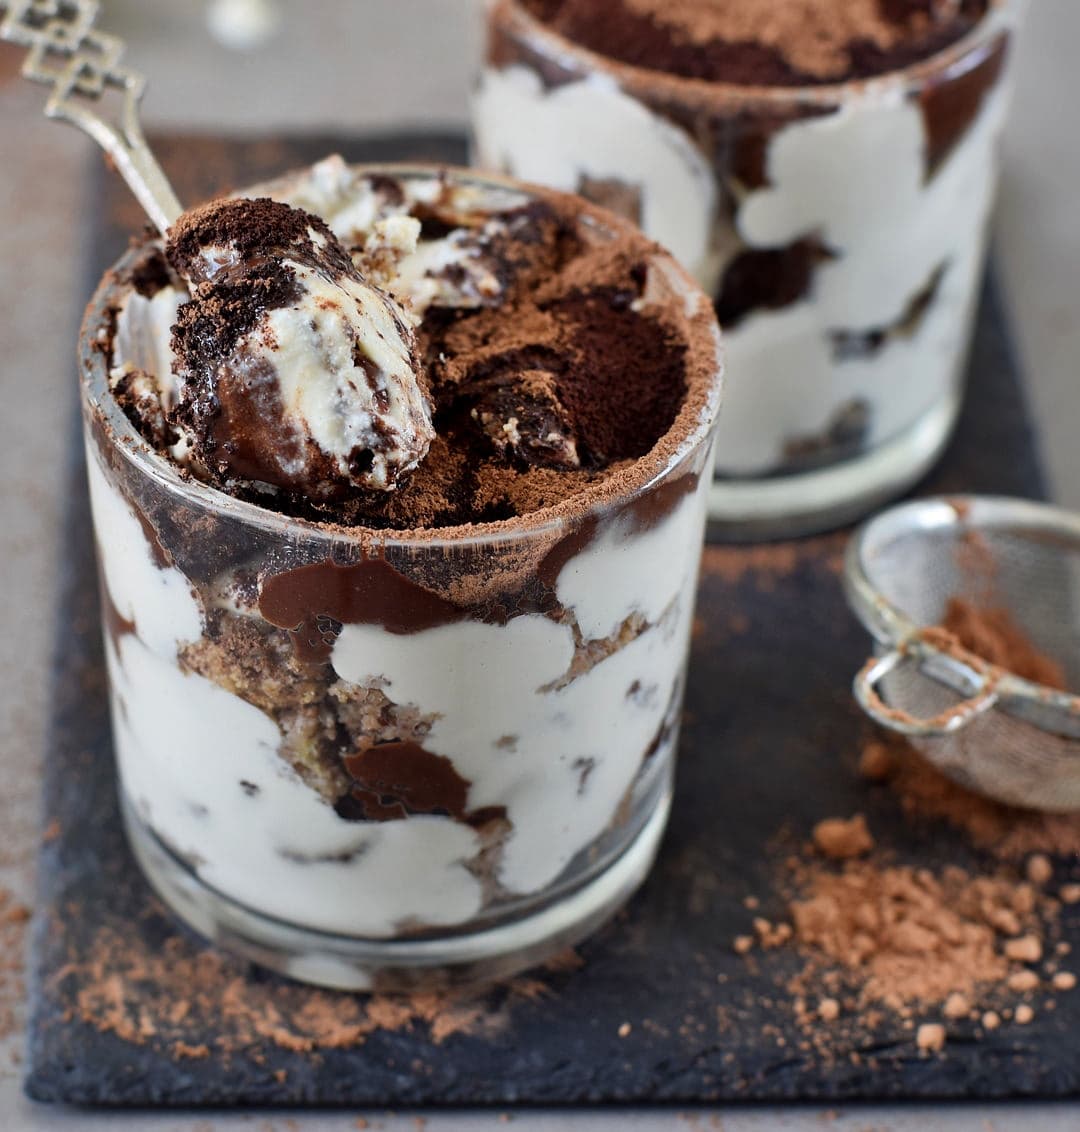
And then repeat, making as many layers as you can fit in the jar, with a layer of cream topped with the remaining chocolate sauce at the top of each jar.
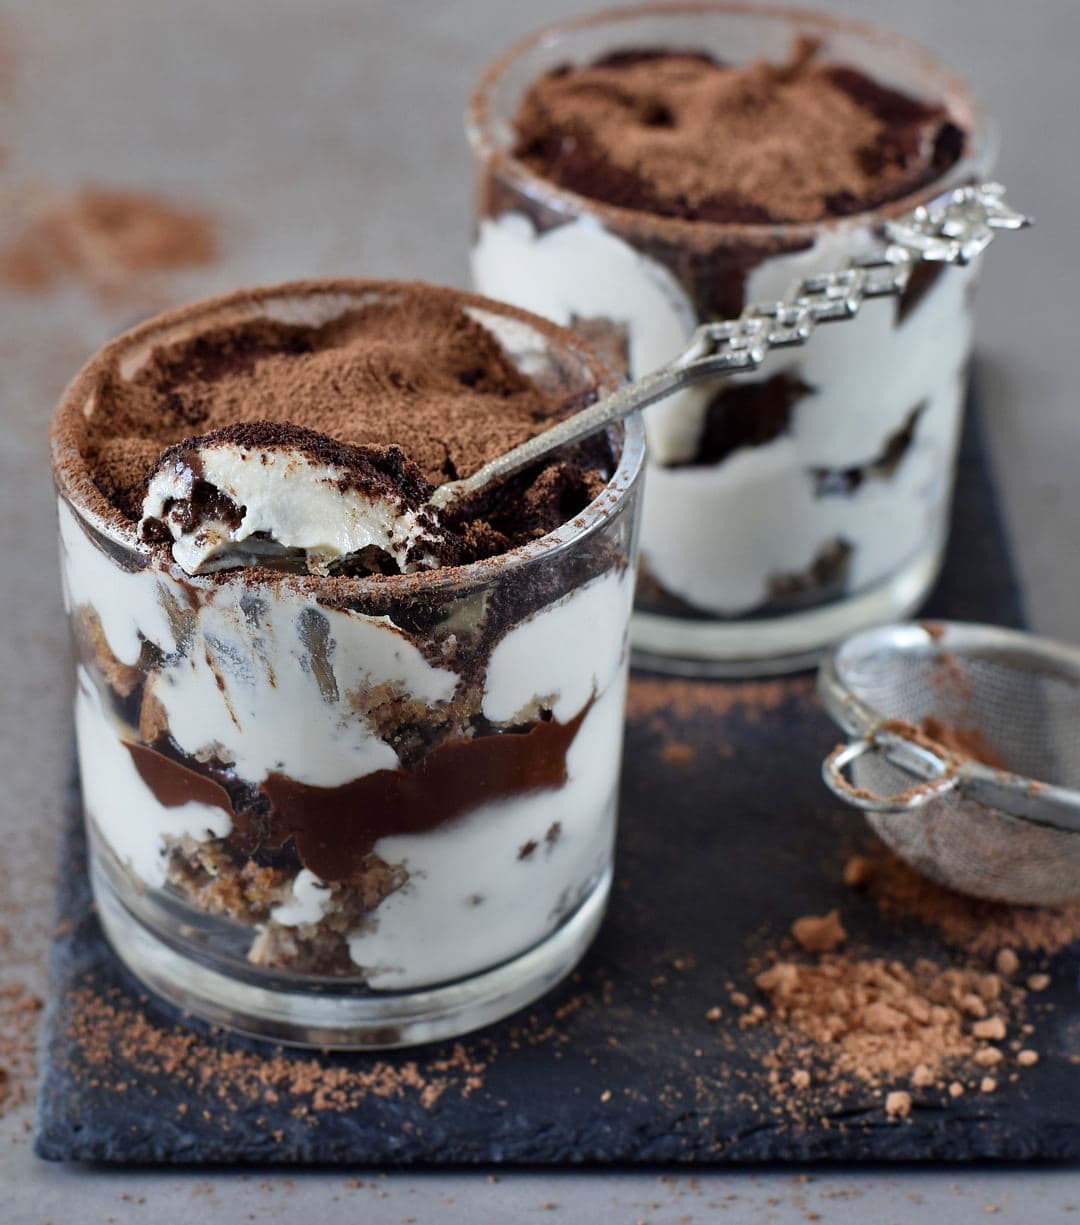
Finally, dust each of the tiramisu ‘trifles’ with some cocoa powder and place them in the refrigerator until you’re ready to serve. I recommend allowing the flavors to meld for an hour before serving.
How to Serve?
Enjoy the tiramisu trifles/ individual tiramisu cups topped with berries (strawberries and raspberries), shaved dark chocolate, coconut whipped cream/ vegan heavy whipping cream, or even served with a scoop of ice cream. I also like to serve these mini tiramisu desserts alongside a cup of coffee or hot chocolate!
How to Store Tiramisu Cups?
Make-ahead: These mini tiramisu cups are great for prepping/ making ahead for the holidays. Whether you want to prep individual elements or the entire dessert. You can prepare the gingerbread/brownie and the vegan mascarpone cream several days in advance and store separately in airtight containers in the fridge until you’re ready to assemble the dessert. Store: Once assembled, you can store the dairy-free tiramisu cups covered with plastic wrap in the fridge for 3-4 days. Freeze: Assemble the tiramisus in a jar/cup style that’s freezer-safe (minus the cocoa powder topping) with headspace. Freeze for up to three months. Remove them from the freezer for 30 minutes and leave to thaw on the counter for 30 minutes before serving. Dust with cocoa powder and enjoy!
What is the best dish for this individual tiramisu dessert?
This really depends on the portion size and aesthetic you’re looking for. I used regular, short drinking glasses. ½ pint mason jars would also work along with trifle cups or wine glasses. Make sure to adjust how much cake you use per layer based on the height of the container.
Can I use vanilla wafers instead of ladyfingers/cake?
Absolutely. I’ve previously made these tiramisu cups with these homemade gluten-free vanilla wafers. If doing so, I recommend dipping them in a coffee mixture to soften.
Can I make a large version?
You could use a full-sized trifle bowl/container or an 8 or 9-inch squash dish to layer the ingredients. Rather than slicing, I serve it with a spoon as a tiramisu trifle.
Recipe Notes and Top Tips
For a thicker cream: If you want a thick, mascarpone-style cream, follow the method I use for my regular tiramisu. For neat layers: If you want clean layers visible from the side of the glasses, you can bake the cake/brownies in a cake tray and then use a cutter (or a spare glass) to cut sections of the cake to perfectly fit in the glass. Any leftovers can be used to make crumbled versions. Allow the flavors to meld: While you can technically serve the tiramisu cups immediately, I highly recommend chilling them for 30-60 minutes first. This will give all the flavors a chance to meld for a superior overall flavor. Feel free to double the chocolate layer: Double the amount and layer the vegan tiramisu in a cup as cake, cream, chocolate, cake, cream, chocolate, etc.
More Dinner Party Dessert Recipes
Baked coffee cheesecake Lemon cheesecake bars 2-ingredient condensed milk truffles Gluten-free carrot cake bars The best vegan chocolate pudding Apple crisp without oats
If you try this easy gluten-free, vegan tiramisu cups recipe, I’d love a comment and ★★★★★ recipe rating below. Also, please don’t forget to tag me in re-creations on Instagram or Facebook with @elavegan and #elavegan—I love seeing them.
If you are using Pinterest, feel free to pin the following photo: