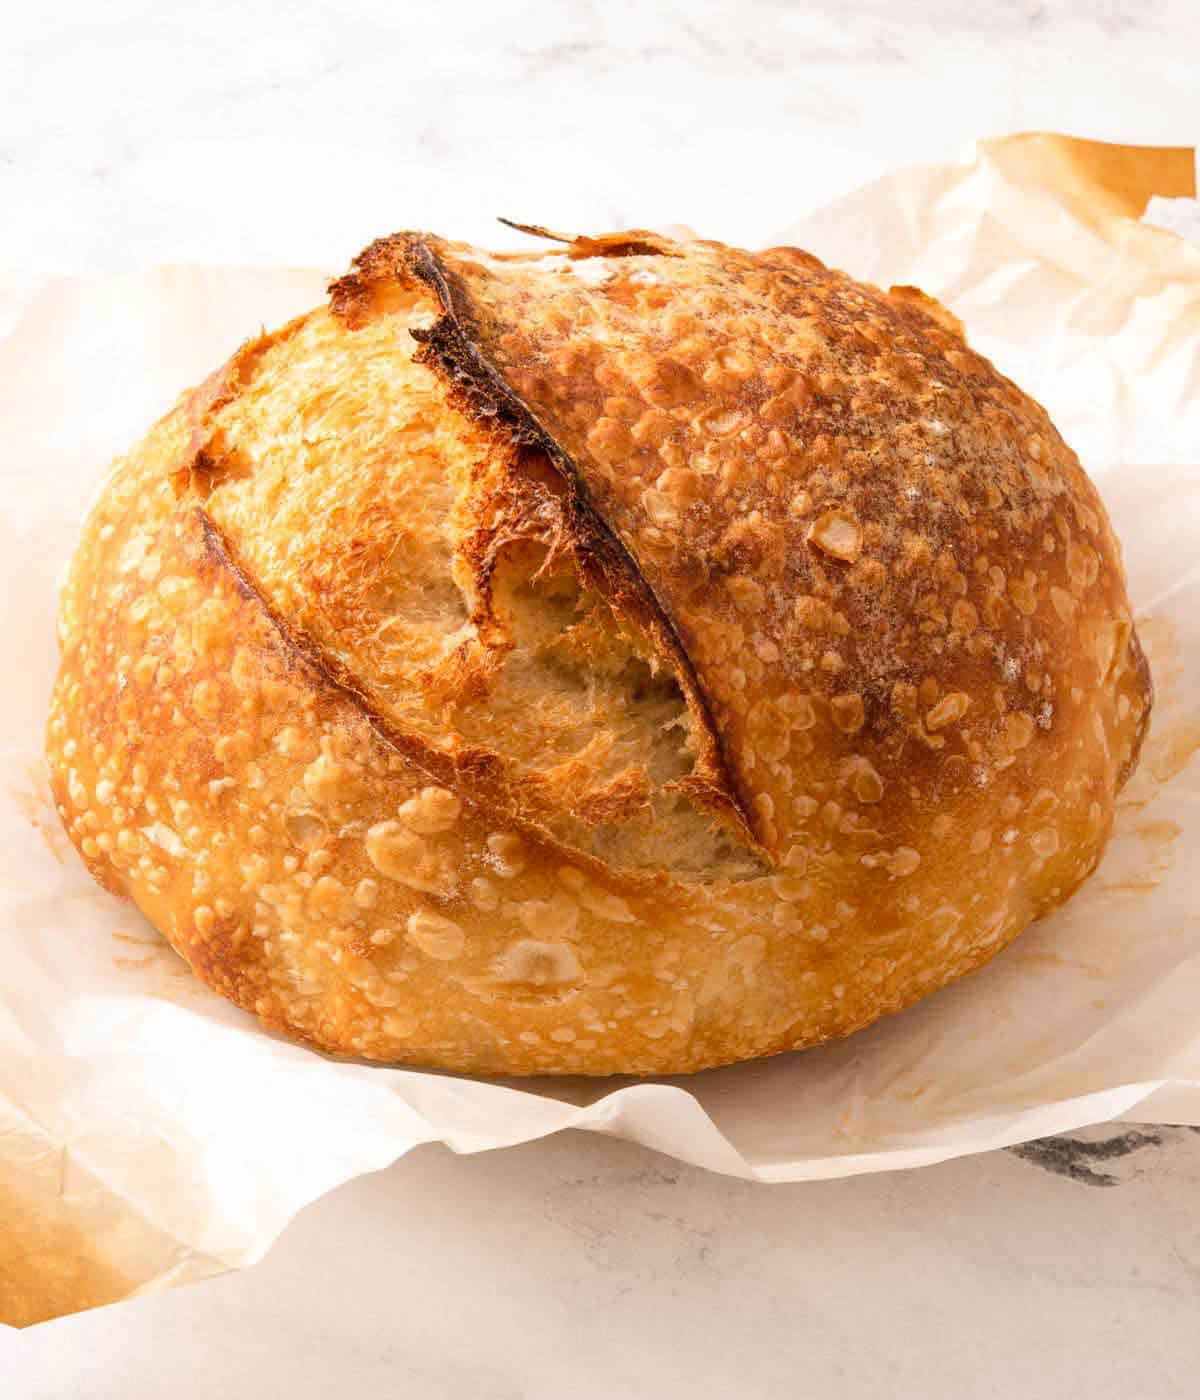
There is nothing better than a freshly baked loaf of sourdough. It has a slightly acidic, tangy flavor from the sourdough starter that will leave you wanting to eat the entire loaf in one sitting. This post will cover the basics of sourdough baking, and over time, you will master bread making! Want to make another loaf of bread? Try my artisan bread recipe, beer bread recipe, or brioche bread recipe.
What You Need to Make This Recipe
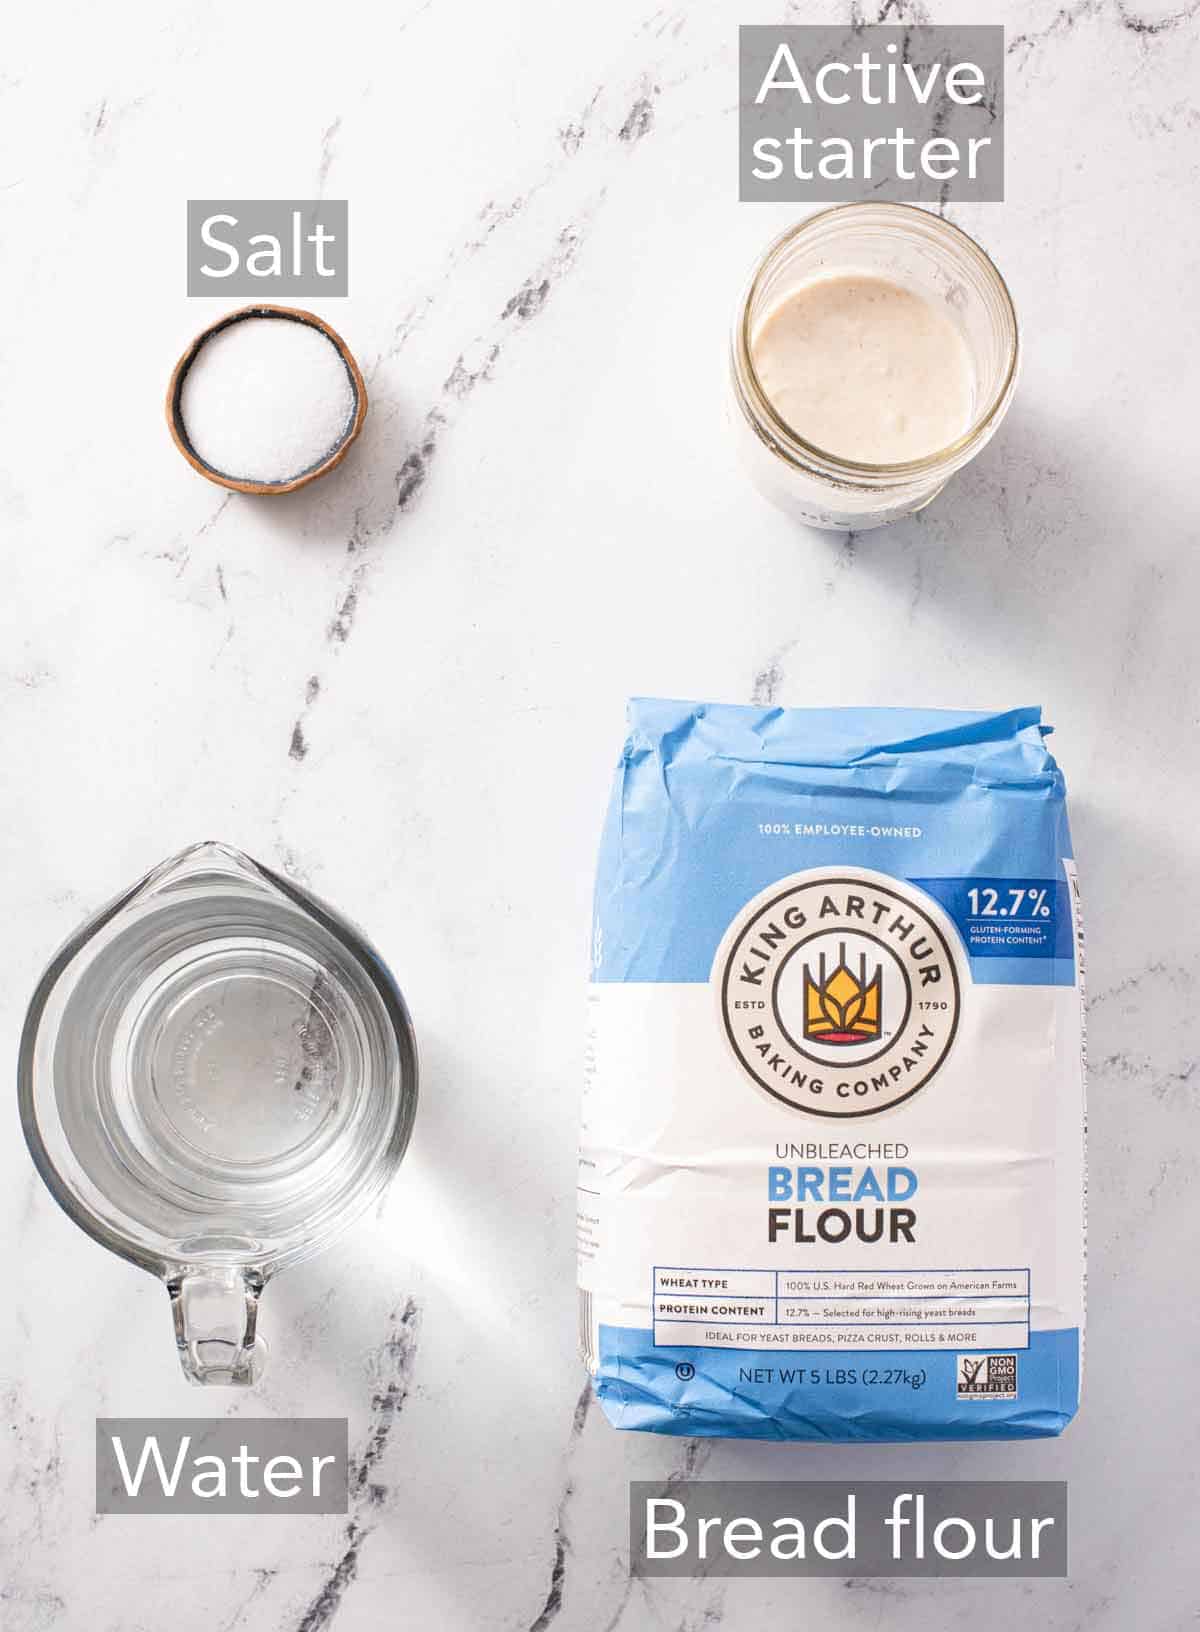
Water — use warm water that is between 80° and 85°F. If the water is too hot, you will destroy the enzymes in your sourdough starter, while cold water will slow them down. Water between 80° and 85°F is ideal for keeping the enzymes active. Active starter — unlike regular bread, sourdough bread uses an active starter instead of yeast to help it rise in the oven. It’s also what gives the bread its signature tangy flavor. See my full sourdough starter recipe to make your own. Flour — I like using bread flour as it is higher in protein than all-purpose flour to form the gluten needed for a delicious, chewy loaf of sourdough bread. Salt — you will need salt for flavor! If you skip the salt, you’ll have a flavorless loaf of sourdough bread.
How to Make Sourdough Bread
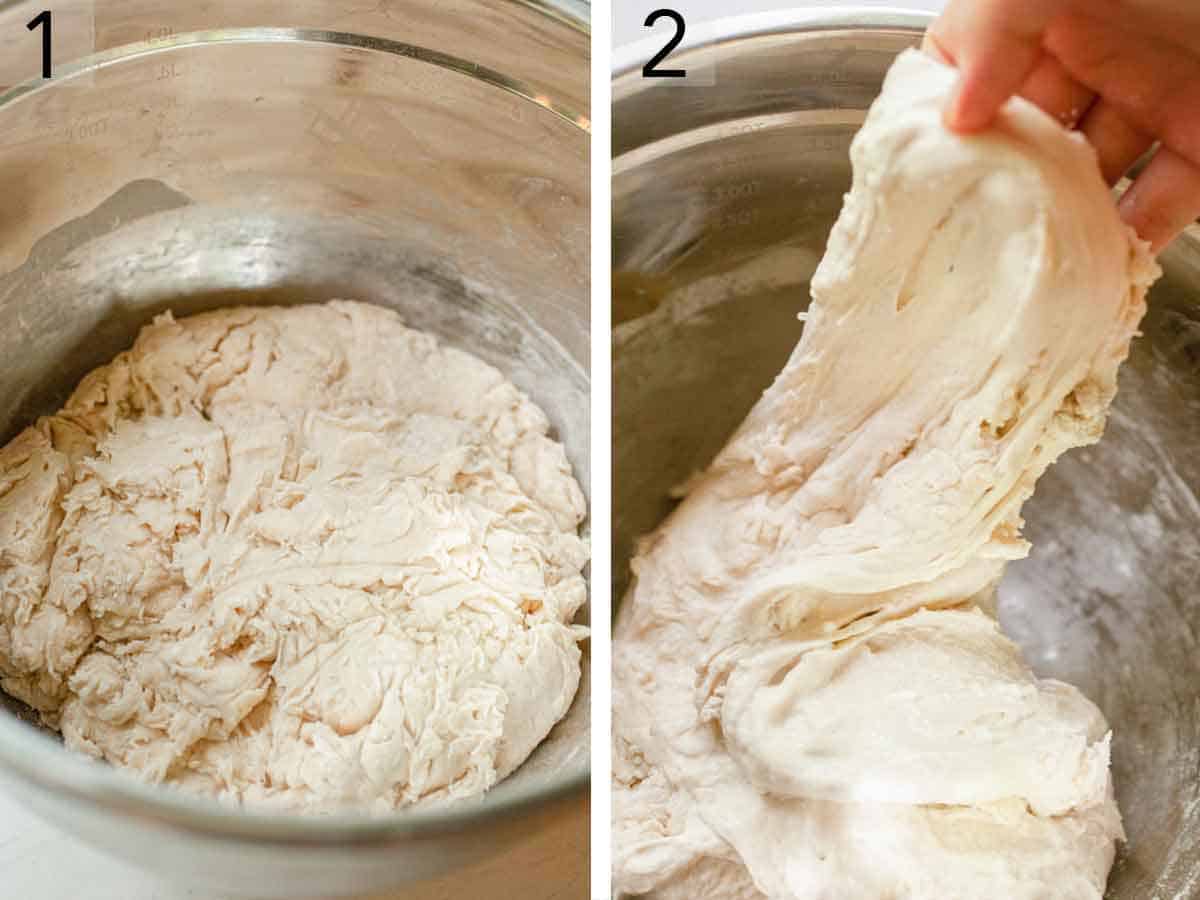
- In a large metal bowl or glass bowl, whisk together the water and starter until mostly combined. Add the flour and salt. Stir together by hand or spatula until the mixture is very shaggy, but most of the flour is mixed in. Cover with a damp kitchen towel or plastic wrap and let it sit at room temperature for 1 hour.
- Fill a bowl or measuring cup with several inches of cold water. Uncover your dough.With the dough bowl directly in front of you, dip your fingers into the water, and then slide them under one edge of the dough down to the bottom of the bowl. Stretch and fold the dough to the center, rotate the bowl 90°, and repeat the stretch and fold until you’ve made 4 folds and turns.
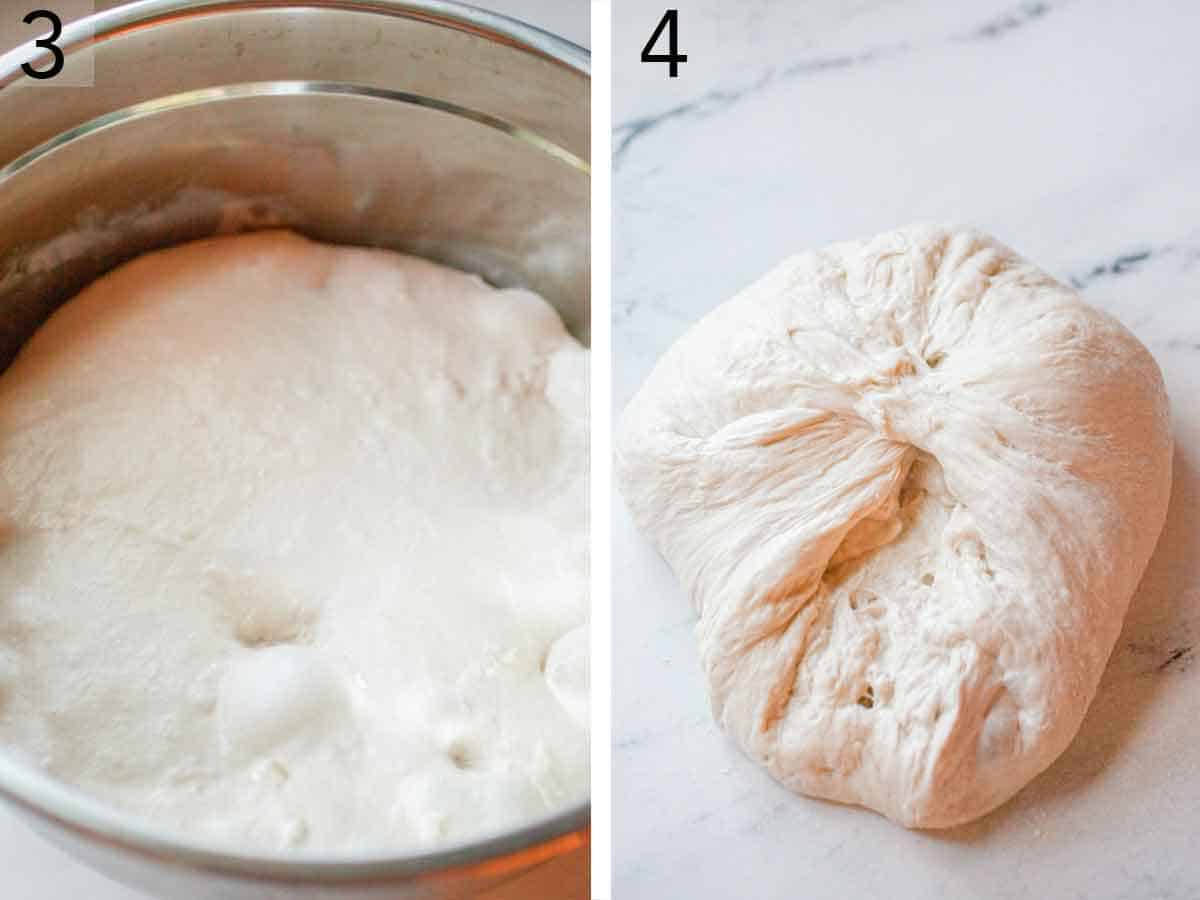
- Recover the bowl and rest for another 20 minutes. Repeat the stretch and fold process again, and either repeat twice more or move onto the bulk rise. Shape your dough into a ball, then cover and let the dough rise until well puffed, 6 to 12 hours.
- Dip both hands in cold water. Slip your fingers under the dough on either side and lift the dough up about a foot or two above the counter. It should essentially be draped over your hands. Place it on the counter. Sprinkle the top of the dough lightly with flour, and flip it over, so the floured side is down. Pinch all the edges into the center, like bundling up a sack. Flip it over and start shaping it into a round sourdough boule shape.
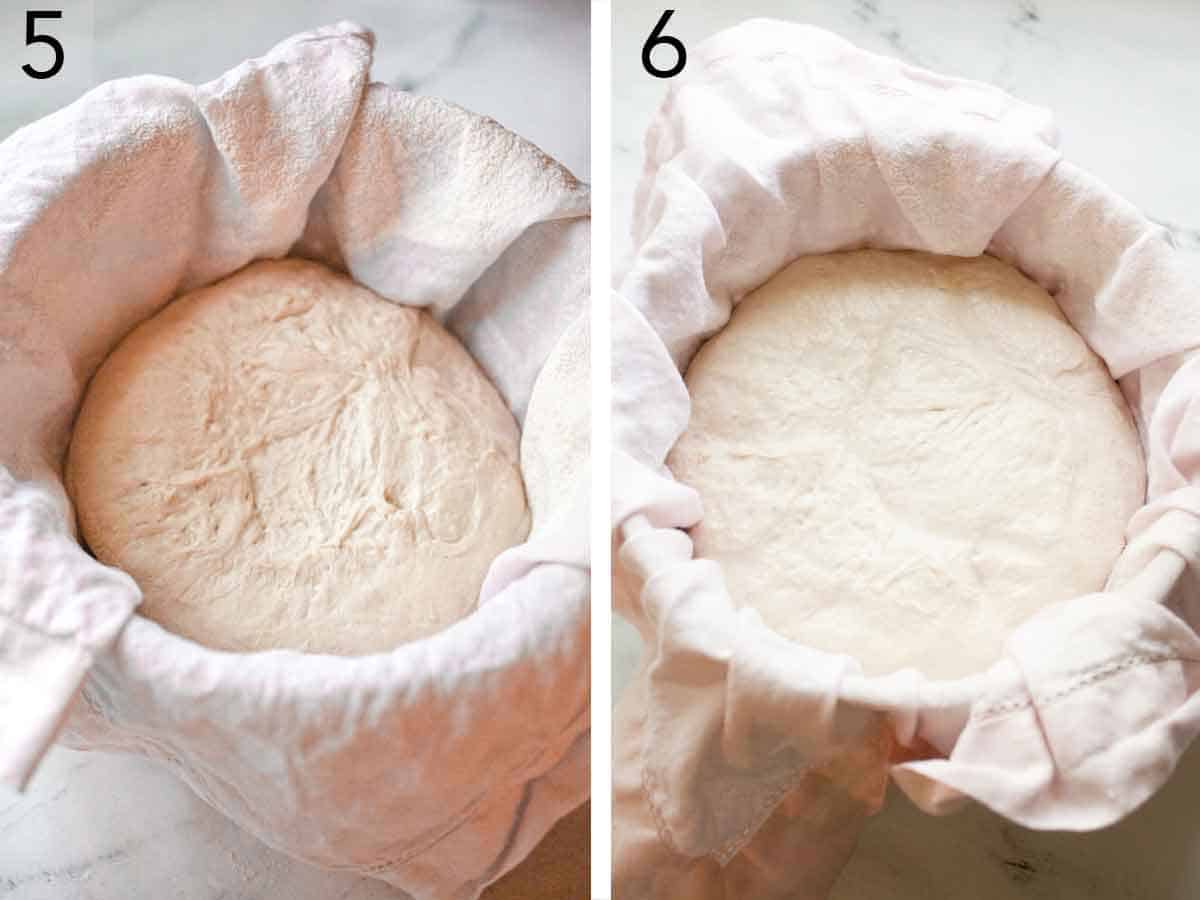
- Line a bowl or colander with a clean, smooth kitchen towel and dust generously with flour. With the help of your dough or bench scraper, carefully pick up the dough ball and flip it over, setting it smooth side down in the towel.
- Cover and rise at room temperature for 30 minutes. After the 30-minute rise, place the loaf in the refrigerator while the oven preheats. Place a large cast-iron Dutch oven or large heavy-duty oven-safe pot with the lid on in the oven and preheat the oven to 500F for 1 hour.
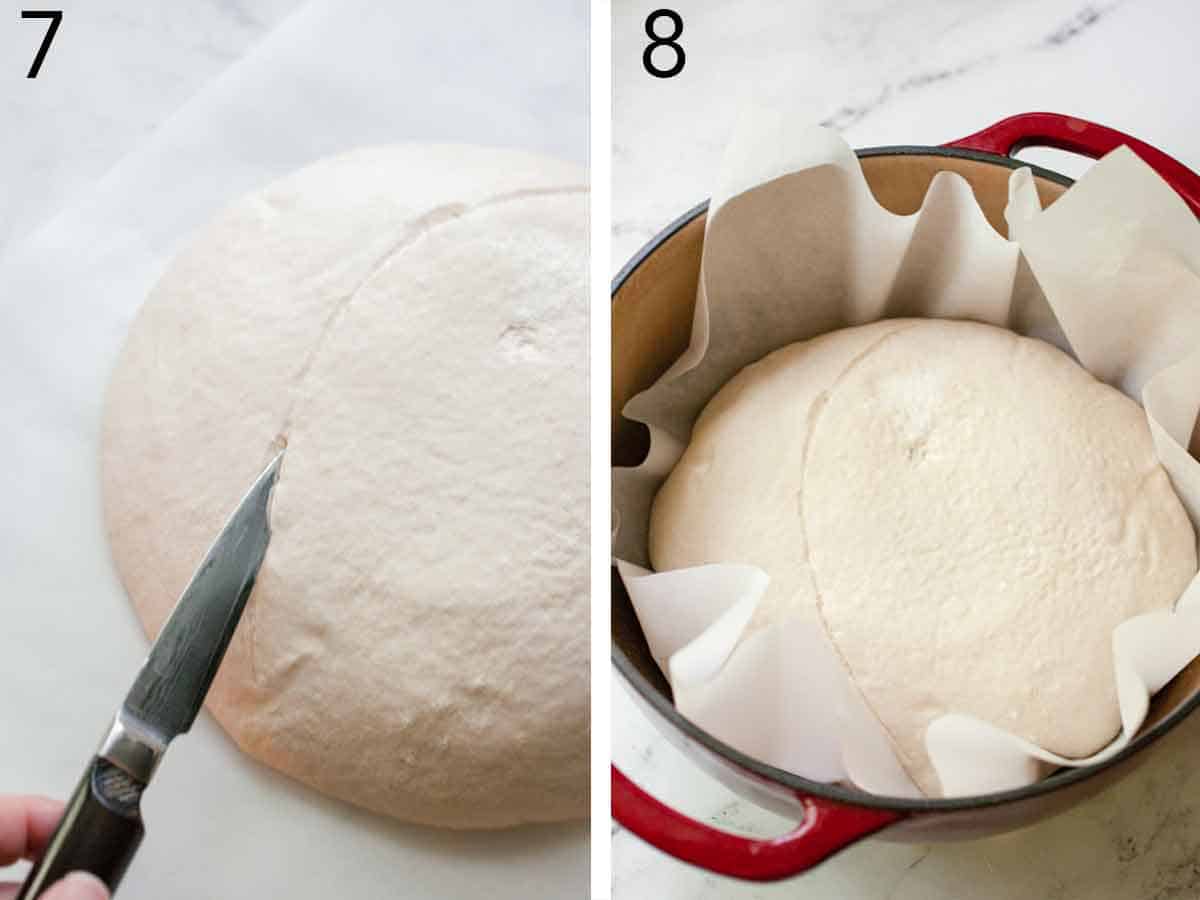
- When ready to bake, uncover and lightly flour the loaf. Place a piece of parchment paper on top of the bowl and a baking sheet over that. Invert the dough, and remove the bowl and towel. Using a sharp knife, make a shallow cut down the length of the loaf or cut in a decorative design.
- Carefully remove the pot from the oven. Using the parchment paper as handles, place the loaf along with the parchment paper inside the pot and cover with the lid.
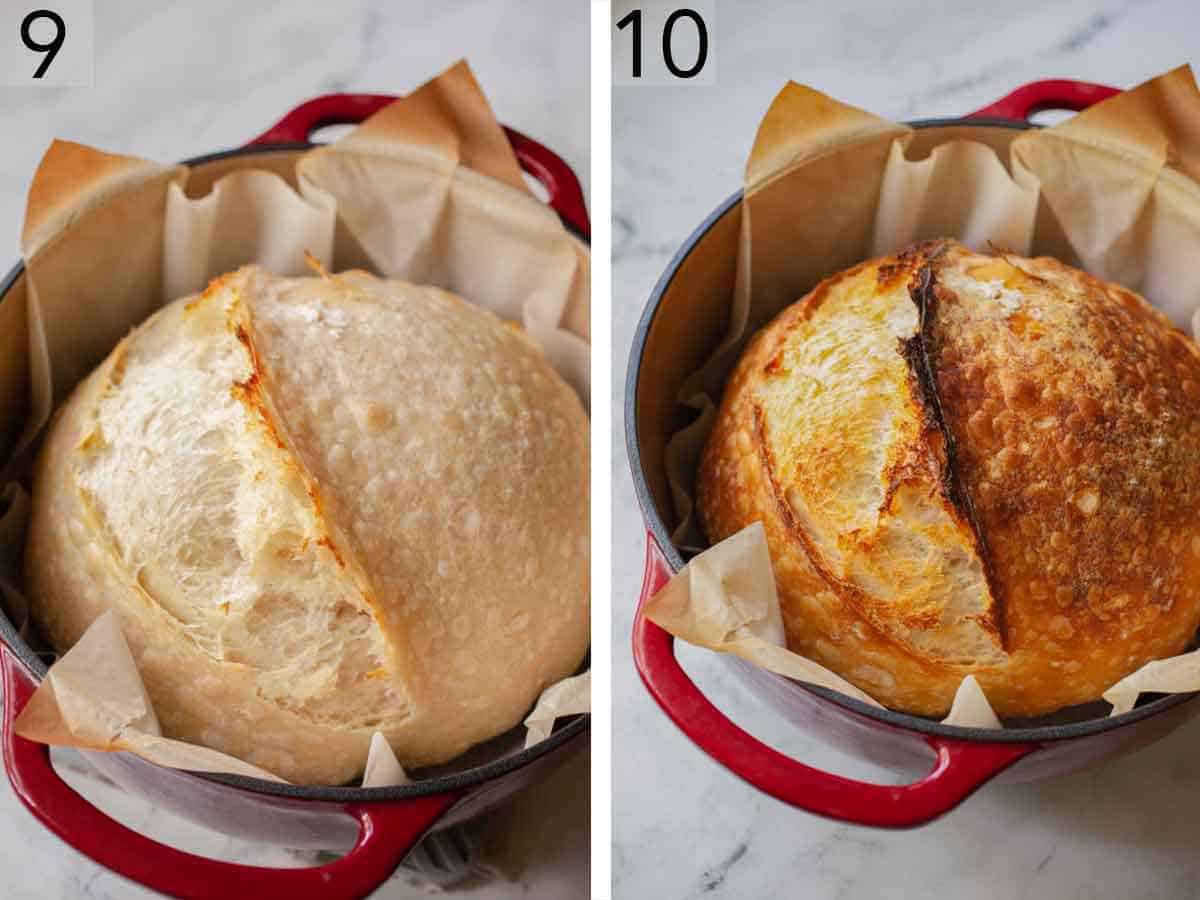
- Bake the sourdough bread dough for 20 minutes. Reduce the oven temperature to 450F.
- Carefully remove the lid and continue baking until the crust is a deep golden brown, or the internal temperature is 195F to 205F, about 20 minutes more. Use the parchment and a spatula to lift the sourdough bread out of the pot and place the loaf on a wire rack to cool completely before slicing.
Pro Tips for Making This Recipe
Active starter: I recommend feeding your starter several hours before you want to start your sourdough loaf. You can use a refrigerated starter that has been fed and then chilled within 3 to 4 days of being fed. Otherwise, feed your starter, then look for it to rise, then start to fall. You want to use it when it’s “hungry,” which is when the starter rises up and deflates again.Bulk Rise Time: The colder the environment, the longer it will take to rise, and vice versa. In the summer, I leave it on the counter. In the winter, I’ll place it in a proofing drawer or the oven with the light on. You can also choose your environment based on when you want to bake the bread. If you made the dough in the morning and want to bake it in the evening, put it in a warm spot to rise. Pop it in the fridge if you want to slow down the process and bake it a day or two later.Weighing the ingredients is the best and most accurate way to make a great loaf. It ensures the ratio of flour to water to starter is correct for the ideal ferment. Of course, you can still make this recipe without a scale, but if you have one, I highly encourage you to use it. Plus, there are no measuring cups to clean!If you have a seasoned (non-enamel) cast iron Dutch oven, I recommend using that. If you only have enamel, use an old one or buy one specifically for bread making. Because the pot goes in the oven at a very high temperature for an extended period of time, it will likely discolor the inside and/or outside coating. It shouldn’t cause damage to the enamel that is in good condition, but it will change its appearance. I like to use an old Dutch oven that’s clean but that I’m not concerned about looking nice.I suggest you keep notes when making this sourdough bread recipe. Trying to keep track of all the steps if you are going off from memory can be a little overwhelming. Also, I suggest keeping notes, as the time it takes for your dough to rise depends on the temperature of your kitchen. Keeping a record of the temperature and time it took for the dough to rise will help you perfect the timing of your sourdough loaf over time. You can also keep track of how many stretches and folds your boule prefers so that you can reference it later on.Instead of kneading the dough, sourdough requires you to stretch and fold the dough. This process strengthens the dough without overworking it and will add height and structure to the loaf. Be patient, and don’t skip the stretch and fold process.Scoring the dough before baking your sourdough bread helps control how the bread expands in the oven. Don’t press down on the dough as you score it, as you’ll deflate it. Make sure you score the dough right before you bake it. If you score it and leave it out, the loaf might deflate. If you skip scoring the bread, the sourdough bread will burst open in unexpected areas as the dough expands while baking.
If you’ve tried this Sourdough Bread recipe, then don’t forget to rate the recipe and let me know how you got on in the comments below, I love hearing from you!